How to Make Layered Soap: Cold Process Techniques for Clean, Even Layers
Learn how to make layered soap with cold process techniques. Get tips for even layers, gradient effects, color combos, and troubleshooting common mistakes.

How to Make Layered Soap: Cold Process Techniques for Clean, Even Layers
Layered soap is one of the most visually striking designs you can make with cold process, and it's more approachable than you'd think. The basic idea is simple: pour one colored layer, let it firm up just enough to hold weight, then pour the next on top. The result is clean, distinct bands of color that look professional and sell incredibly well at craft fairs.
If you've already got a basic cold process recipe you're comfortable with, you have everything you need to start layering. This guide covers the techniques, timing, and troubleshooting that'll get you from a blobby mess to perfectly straight layers.
- What makes layered soap different from swirled soap
- Equipment you'll need for layered soap
- How to plan your layers before you start
- Step-by-step cold process layering method
- How to get perfectly even layers every time
- Gradient and ombré layering techniques
- Best colorants for layered soap
- Troubleshooting layered soap problems
- Frequently Asked Questions
What Makes Layered Soap Different from Swirled Soap
Swirled soap blends colors together while the batter is still fluid. Layered soap keeps each color completely separate with a visible line between them. Think of it like a layer cake versus a marble cake.
The key difference in technique comes down to timing and trace. Swirls need thin, pourable batter that blends easily. Layers need you to wait between pours so each section sets up enough to support the next one. You're working against time with swirls; you're working with time for layers.
Layered designs also tend to be more forgiving than swirls. If your colors aren't perfectly mixed or your pour isn't totally smooth, it doesn't matter as much because each band stands on its own. That's what makes this a great next step after you've mastered a basic single-color batch.
Equipment You'll Need for Layered Soap
You don't need any special equipment beyond your standard cold process setup. Here's what to have ready:
- Your standard soap making supplies (stick blender, scale, safety gear, mixing bowls)
- Extra mixing containers (one for each layer color you're planning)
- Colorants (micas, clays, or natural colorants)
- 99% isopropyl alcohol in a spray bottle (critical for layer adhesion)
- A digital thermometer (temperature matters more with layers)
- A slab mold or loaf mold (loaf molds work best for beginners)
The spray bottle of alcohol is the one thing you absolutely can't skip. It's what makes your layers stick together instead of separating when you cut the bars. More on that below.
How to Plan Your Layers Before You Start
Layered soap requires more planning than a single-color batch because you're splitting your batter into portions and timing each pour. Here's how to set yourself up for success.
Pick your layer count
Two to four layers is the sweet spot for cold process. More than four and you're looking at very thin layers that are hard to pour evenly, plus the first layers may set up too firm before you finish. Start with two layers for your first attempt.
Decide on your recipe split
If you're making a 2-pound batch with three layers, you'll need roughly equal portions of batter for each layer. Use the Soaply calculator to scale your recipe and figure out your total oil weight, then divide accordingly.
For a three-layer soap, a good split is:
- Bottom layer: 35% of total batter
- Middle layer: 30% of total batter
- Top layer: 35% of total batter
The bottom and top layers are slightly larger because they anchor the visual design.
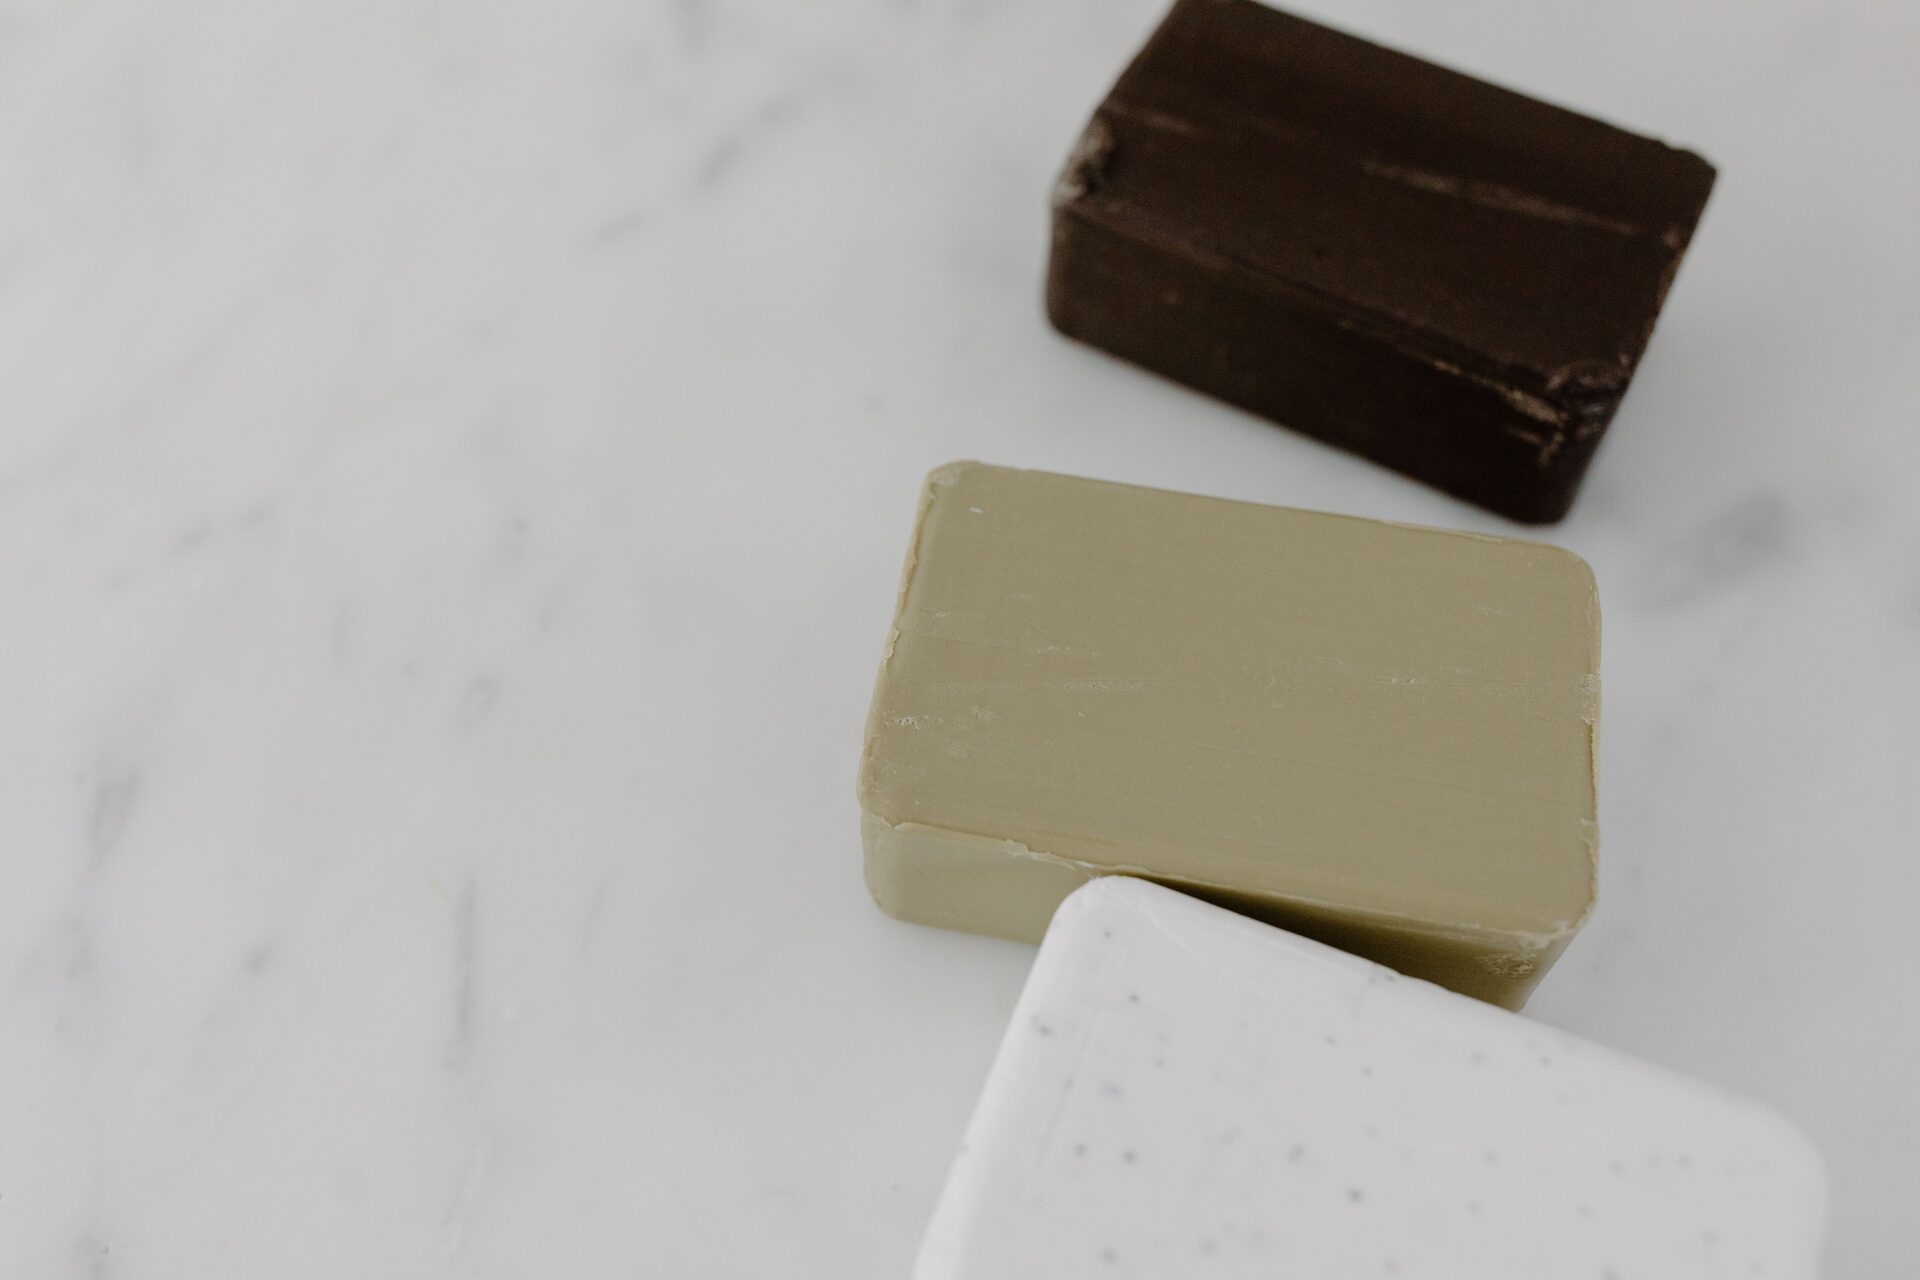
Choose contrasting colors
Colors that are close in shade (light blue and medium blue) can look muddy when layered. For your first attempt, pick two or three colors that contrast well. Some proven combinations:
| Combination | Colorants | Effect |
| --- | --- | --- |
| Classic two-tone | White + deep purple mica | Clean, modern |
| Earth tones | Turmeric + cocoa powder + white | Warm, natural |
| Ocean theme | Blue mica + white + teal mica | Fresh, vibrant |
| Berry blend | Pink clay + white + activated charcoal | Bold contrast |
Prep your colorants in advance
Pre-mix each colorant into a small amount of lightweight oil (like sweet almond or fractionated coconut) before you start your batch. This lets you color each portion quickly when it's time. You don't want to be fumbling with mica bags while your batter is thickening.
Step-by-Step Cold Process Layering Method
Here's the full process from lye water to unmolding.
1. Make your lye solution and oil mixture as usual
Prepare your lye solution and melt/measure your oils using whatever method you normally follow. Let both cool to around 100 to 110°F. A slightly cooler soaping temperature gives you more working time between layers, which is exactly what you want. Check our temperature guide if you need help with this.
2. Combine and bring to light trace
Add your lye solution to your oils and stick blend to light trace. Light trace looks like thin cake batter where drizzles from the blender slowly sink back into the surface. Don't go past this point yet.
Understanding trace levels is probably the single most important skill for layering. Too thin and your layers bleed together. Too thick and you can't pour evenly.
3. Split and color your batter
Quickly divide your batter into your pre-planned portions. Add your pre-mixed colorants to each container and stir (don't blend) until the color is uniform. Stirring by hand avoids thickening the batter further.
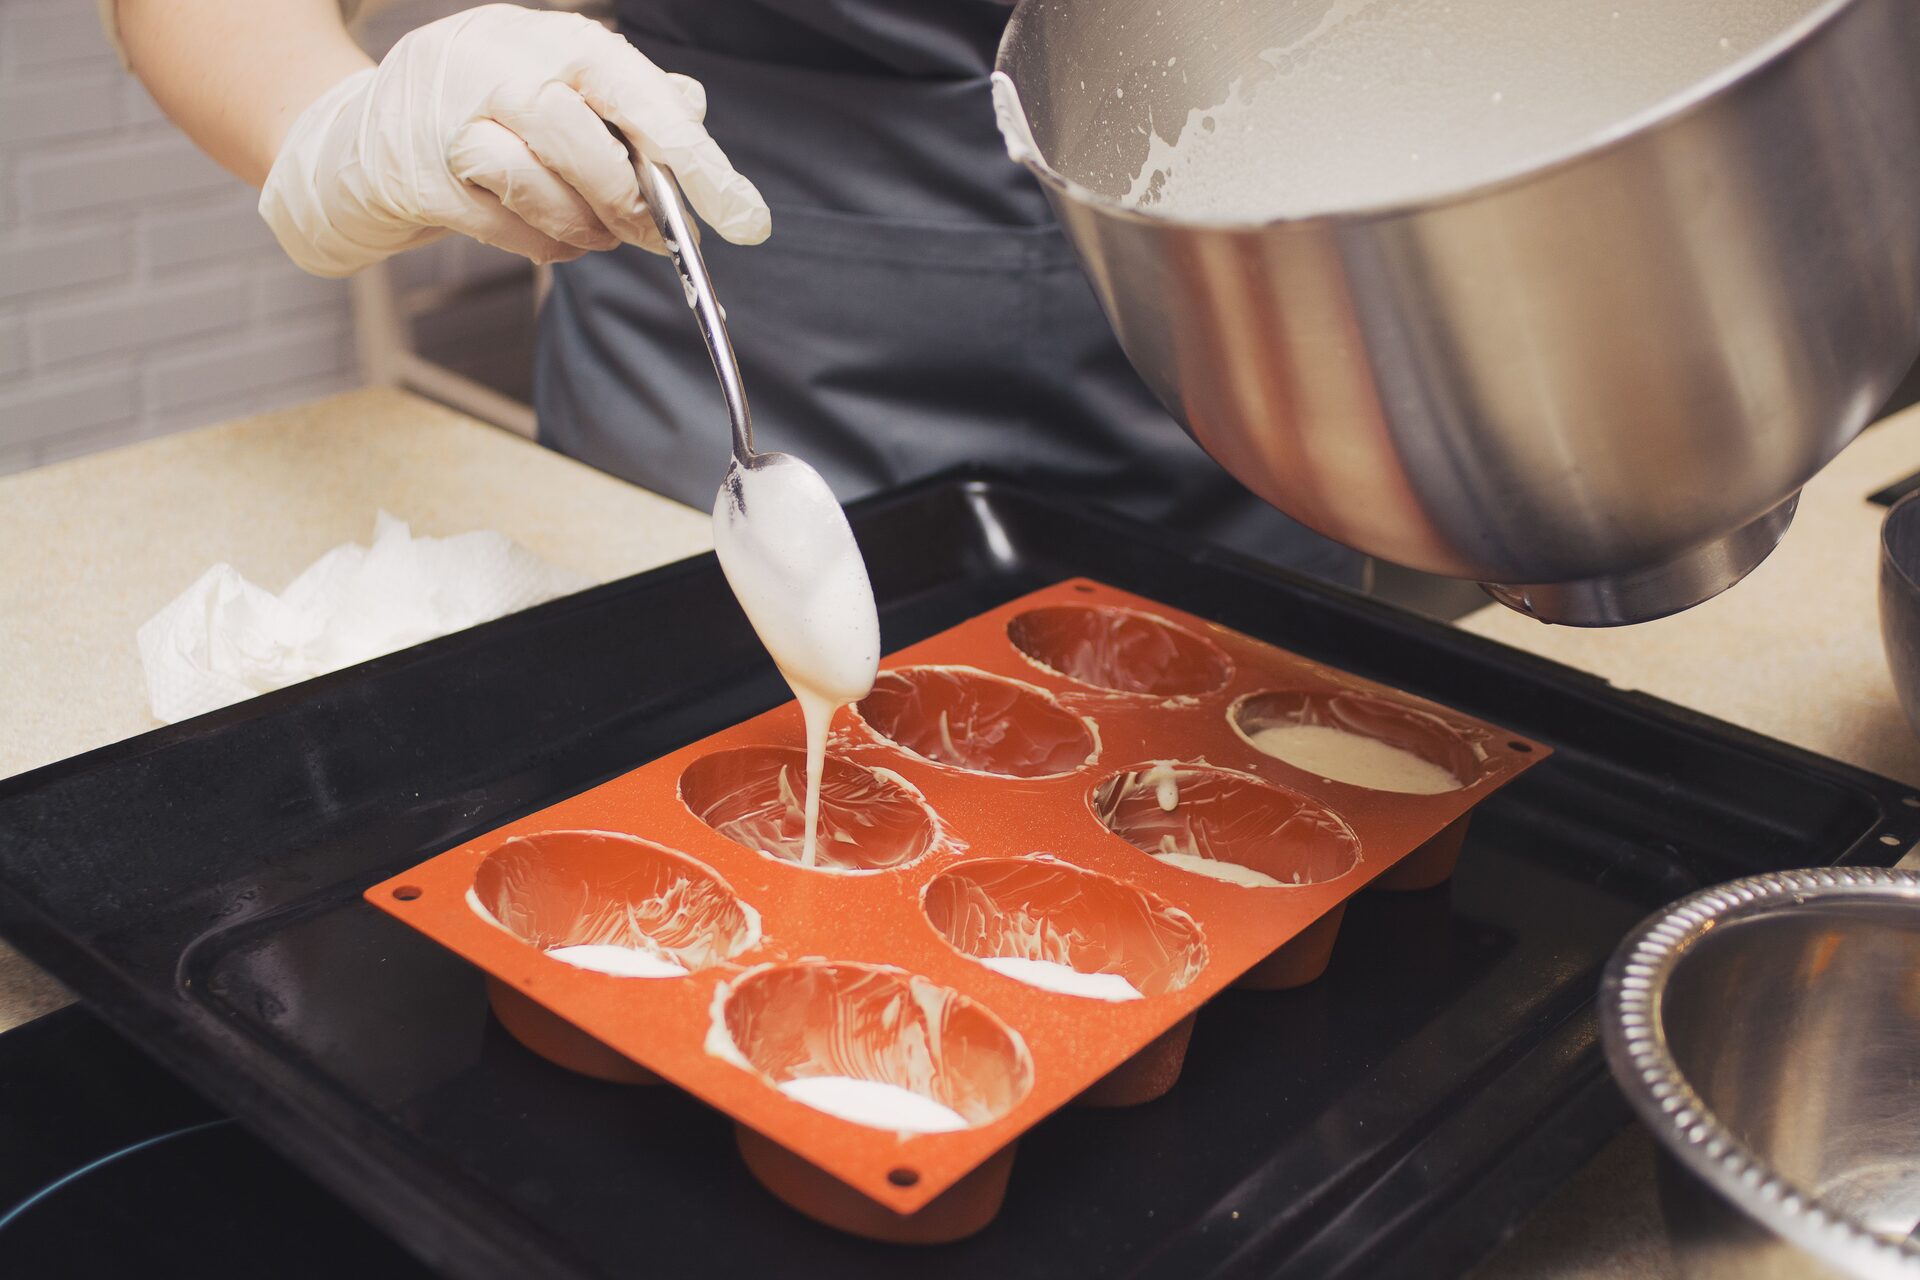
4. Pour the first layer
Bring your first portion to medium trace (a pudding-like consistency where batter holds a trail on the surface) and pour it into your mold. Tap the mold firmly on the counter a few times to level it and release air bubbles. You want this layer flat and even.
5. Wait for the first layer to set
This is where patience matters. The first layer needs to firm up enough that it won't blend with the next pour, but not so firm that the layers won't bond. Depending on your recipe and room temperature, this takes anywhere from 20 minutes to a few hours.
Test it by gently pressing the surface with a gloved finger. If it holds a slight impression without breaking the skin, it's ready. If your finger sinks in, give it more time. If the surface is hard and crusty, you've waited too long (but alcohol spray can still save you).
6. Spray with isopropyl alcohol
Before pouring the next layer, spray the surface of the set layer generously with 99% isopropyl alcohol. This does two things: it slightly dissolves the top surface to create a chemical bond, and it removes any soda ash that's started forming.
This step is non-negotiable. Skip it and your layers will separate when you cut the bars.
7. Pour the next layer
Bring your second color to medium trace and pour it gently over the first layer. Pour from about two inches above the surface to avoid gouging through the set layer below. If you want absolutely straight lines, pour over the back of a spoon to break the fall of the batter.
8. Repeat for additional layers
Continue the wait-spray-pour cycle for each remaining layer. Each successive layer tends to set faster because the heat from the layers below helps.
9. Insulate and cure
Once all layers are poured, insulate your mold as you normally would. If you're forcing gel phase, be aware that gelling can intensify color differences between layers, which usually looks great.
Unmold after 24 to 48 hours and cut your bars. Cure for the standard 4 to 6 weeks.
How to Get Perfectly Even Layers Every Time
The number one complaint with layered soap is uneven layers. Here are the tricks that actually work.
Weigh your batter portions. Eyeballing will never give you consistent layers. Use your scale to divide the batter into exact portions by weight.
Use a ruler or tape on your mold. Mark the target height for each layer on the outside of your mold with painter's tape before you start pouring. This gives you a visual guide as you fill.
Pour slowly from a low height. Fast pours from high up create divots and waves. Pour from about two inches above the surface, using a spatula or spoon to control the flow.
Level each layer before it sets. Gently tap the mold on the counter or use a small offset spatula to smooth the surface. A flat layer below means a flat layer on top.
Keep your room temperature consistent. Drafts and cold spots cause uneven setting, which can make layers thicker on one side. Work in a room that stays between 68°F and 75°F.
Gradient and Ombré Layering Techniques
Once you've got basic two-tone layers down, gradient (ombré) effects are the natural next step. The concept is simple: instead of using completely different colors for each layer, you use the same color at increasing or decreasing intensity.
How to create an ombré effect
- Color your entire batch with your chosen colorant at full strength
- Pour the darkest layer (about 25% of the batch) into the mold
- Add a tablespoon or two of uncolored base batter (white) to the remaining colored batter and stir
- Pour the next layer
- Keep adding white batter and pouring until you reach pure white on top
This works beautifully with strong colorants like ultramarine blue, titanium dioxide for the white layers, or activated charcoal going from black to gray to white.
Diagonal layers
For a more dynamic look, prop one end of your mold up on a book or block (about a 15 to 20 degree angle). Pour each layer while the mold is tilted, waiting for each to set before adjusting the angle. You can tilt the same direction each time for parallel diagonal lines, or alternate directions for a zigzag effect.
This technique looks complex but it's the same basic process. Just make sure your mold is level side to side so the layers don't run to one corner.
Best Colorants for Layered Soap
Not all colorants behave the same way in layered designs. Here's what works best.
Micas
Micas are the top choice for layered soap because they produce vivid, consistent colors that hold up through saponification. Use about 1 teaspoon per pound of oils. Pre-disperse in lightweight oil for smooth, streak-free color.
Clays
Clays give you muted, earthy tones that layer beautifully for a natural look. Kaolin for white, French green clay for sage green, rose clay for pink, and bentonite for gray-green. Use 1 to 2 teaspoons per pound of oils.
Oxides and pigments
Iron oxides (brown, red, yellow, black) and ultramarines (blue, purple, pink) are reliable and affordable. They don't morph or fade and give clean, opaque layers.
Colorants to avoid for layers
- Lab colors (FD&C dyes): These can bleed between layers over time, ruining the clean lines you worked so hard for
- Some natural colorants: Turmeric and paprika can migrate between layers. They're fine for swirls but risky for crisp layered designs
- Colorants that accelerate trace: Some fragrances and micas speed up trace dramatically, giving you less working time. Test first
Troubleshooting Layered Soap Problems
Layers separated when I cut
Your layers didn't bond properly. This almost always means you forgot the isopropyl alcohol spray, or the bottom layer was too set when you poured the next one. If it's a slight separation, you can sometimes rebatch the soap. For future batches, spray generously with alcohol and don't let layers sit longer than a few hours between pours.
Layers bled together
You poured too soon or at too thin a trace. The bottom layer needs to be firm enough to support the weight of the next pour without mixing. Wait until it passes the finger-press test before moving on.
Colors are dull or muddy
This usually happens when colorants aren't mixed well enough or when the colors are too similar in value (lightness/darkness). Use higher contrast colors and make sure your colorant is fully dispersed before adding to the batter.
Uneven layer thickness
Weigh your batter portions instead of guessing. Mark your target heights on the mold with tape. Pour slowly and check your line against the marks as you go.
Air bubbles between layers
Tap the mold firmly on the counter after each pour. The alcohol spray also helps because it breaks the surface tension that traps air. If you still see bubbles, try pouring even more slowly.
Top layer has soda ash but other layers don't
Only the top layer is exposed to air, so only it develops soda ash. Spray the top with alcohol after your final pour and cover the mold with a lid or cardboard. Forcing gel phase also prevents ash on all layers.
💬 Frequently Asked Questions
How long should I wait between pouring soap layers?
It depends on your recipe and room temperature, but most cold process batches need 30 minutes to 2 hours between layers. The surface should hold a light fingerprint without breaking or sinking. Recipes with higher hard oil content (coconut, palm, tallow) set up faster, sometimes in as little as 20 minutes. Soft oil recipes (heavy olive oil) can take several hours. Use the Soaply calculator to check your recipe's hardness rating for an estimate.
Can I make layered soap with melt and pour?
Yes, and it's actually easier because melt and pour sets much faster than cold process. Melt your base, color it, pour the first layer, and wait about 10 to 15 minutes until it forms a solid skin. Spray with alcohol and pour the next layer at about 125°F or cooler. If the second layer is too hot, it'll melt right through the first one. Check our melt and pour guide for base recipe details.
Why did my soap layers separate after cutting?
The most common cause is skipping the isopropyl alcohol spray between layers. Alcohol creates a chemical bond between the set layer and the fresh pour. The second most common cause is waiting too long between layers; if the surface becomes hard and forms a thick skin, even alcohol can't fully reactivate it. Try to pour the next layer within 2 to 3 hours of the previous one.
Do I need a special recipe for layered soap?
No. Any cold process recipe you already use will work for layers. That said, recipes that reach trace slowly give you more working time, which is helpful when you're splitting batter and coloring multiple portions. Recipes heavy in olive oil are naturally slow-tracing. Avoid fragrance oils known to accelerate trace unless you're very confident in your timing.
How many layers can I make in cold process soap?
Two to four layers is practical for most soapmakers. Beyond four, the layers become very thin and hard to pour evenly, and the first layers may be fully set (making bonding difficult) by the time you pour the last ones. Some advanced soapmakers create rainbow soaps with six or seven layers, but that requires a large batch, fast-setting recipe, and a lot of practice.
Layered soap is one of those techniques that looks way harder than it is. Your first attempt might have a few wobbly lines or a layer that's thicker than you planned, but even imperfect layers look great when the color contrast is right. Grab your recipe, pick two bold colors, and give a two-layer bar a shot. Run it through the Soaply calculator to nail your measurements, and you'll have bars that look like they came from a boutique.
Ready to Try It?
Use our free soap calculator to create your perfect recipe with real-time property predictions.
Open Calculator