How to Prevent and Remove Soda Ash on Cold Process Soap
Soda ash leaves a white, chalky film on cold process soap. Learn 7 proven ways to prevent it and 3 easy methods to remove it from finished bars.

How to Prevent and Remove Soda Ash on Cold Process Soap
Soda ash is the white, chalky film that shows up on the surface of cold process soap. It's completely harmless and won't affect how the soap performs, but it can ruin the look of an otherwise perfect batch. If you've ever pulled your bars out of the mold and found them coated in a powdery white layer, you've met soda ash.
The good news? It's preventable. And if it does show up, it's easy to remove. Here's everything you need to know.
- What Is Soda Ash and Why Does It Form?
- Is Soda Ash Harmful?
- 7 Ways to Prevent Soda Ash
- How to Remove Soda Ash from Finished Bars
- Which Recipes Are Most Prone to Soda Ash?
- Can You Use Soda Ash as a Design Element?
- Frequently Asked Questions
What Is Soda Ash and Why Does It Form?
Soda ash (sodium carbonate) forms when unsaponified sodium hydroxide on the surface of your soap reacts with carbon dioxide in the air. That reaction creates a thin layer of sodium carbonate crystals, which is the white, powdery film you see on the top and sometimes the sides of your bars.
It typically shows up within the first 24 to 48 hours while the soap is still in the mold or shortly after unmolding. Several conditions make it more likely:
- High water content in the soap batter. More water means more unreacted lye near the surface as the soap sets up.
- Low soaping temperatures. Cooler batter doesn't push saponification as hard during the initial set, leaving more unreacted lye exposed to air.
- No gel phase. Soap that doesn't go through gel phase stays cooler, which slows the reaction and gives CO2 more time to interact with surface lye.
- High humidity or cold ambient temperatures in your workspace. These conditions slow saponification and increase surface moisture.
- Uncovered soap in the mold. An exposed top is directly open to airflow and CO2.
Understanding these triggers is the key to prevention. Every method below targets at least one of these factors.
Is Soda Ash Harmful?
No. Soda ash is purely cosmetic. It doesn't change the soap's pH, doesn't affect lather or cleansing ability, and won't irritate skin. Your soap is completely safe to use even with a heavy coating of soda ash.
The only issue is appearance. If you're selling handmade soap or giving it as gifts, that white film can make bars look dusty or unfinished. For personal use, you can ignore it entirely.
7 Ways to Prevent Soda Ash
Not every method works perfectly on its own. Most experienced soapmakers combine two or three of these for consistent results.
1. Force Gel Phase
Gel phase is the period during saponification when the soap heats up from the inside, becoming translucent and slightly gel-like before cooling and solidifying. Forcing gel phase pushes the saponification reaction further before the soap's surface is exposed to air, which drastically reduces soda ash.
How to do it:
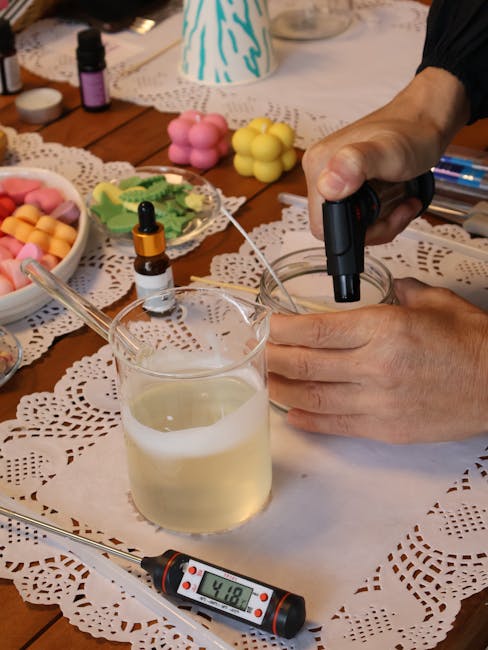
- Pour your soap batter at 100 to 120°F (38 to 49°C)
- Cover the mold with a piece of cardboard or a cutting board
- Wrap the mold in a towel or blanket
- Leave it insulated for 24 hours before unmolding
If your house runs cold (below 65°F / 18°C), place the covered mold on a heating pad set to medium for the first 30 to 60 minutes, then turn it off and leave the soap wrapped.
This is the single most effective prevention method. If you only try one thing from this list, make it this one.
2. Spray with Isopropyl Alcohol
Spraying the top of your freshly poured soap with 99% isopropyl alcohol creates a barrier between the soap surface and the air. It's quick, cheap, and works surprisingly well.
Spray a light, even coat immediately after pouring, then spray again 10 to 15 minutes later. Use 99% rubbing alcohol, not 70%. The higher concentration evaporates faster and forms a better seal. A small spray bottle from the dollar store works fine.
This method is especially useful when you've done a swirl design on top that you don't want to cover with cardboard (which could smear the pattern).
3. Use a Water Discount
The less water in your soap batter, the less opportunity for soda ash to form. A water discount (or higher lye concentration) reduces the total water content while keeping your lye amount the same.
A standard soap recipe uses about 38% lye concentration. Bumping that up to 33% (which is a moderate water discount) noticeably reduces soda ash. Some soapmakers go as low as 28 to 30% for even more ash resistance.
You can dial in the exact water discount using the Soaply calculator. Just adjust the lye concentration slider and the calculator handles the math.
Keep in mind that less water means faster trace, so you'll have less working time for swirls and color work. It also means the soap will set up harder and unmold faster, which is a nice bonus.
4. Soap at Higher Temperatures
Warmer batter saponifies faster at the surface, leaving less unreacted lye for CO2 to interact with. Aim for both your lye solution and melted oils to be between 100°F and 130°F (38°C to 54°C) when you combine them.
Cold soaping (below 90°F) is popular for some designs, but it's a soda ash magnet. If you're dealing with persistent ash, raising your temperatures by even 10 to 15 degrees can make a noticeable difference. Check our temperature guide for more details on how soaping temperatures affect your final bars.
5. Add Sodium Lactate
Sodium lactate is a liquid salt derived from the natural fermentation of sugars. Adding it at 1 teaspoon per pound of oils (about 3% of your oil weight) helps soap harden faster in the mold and promotes gel phase, both of which reduce soda ash.
Add sodium lactate to your cooled lye water before combining it with your oils. It also makes unmolding easier, which is a welcome side effect for tricky mold shapes.
6. Add Beeswax
A small amount of beeswax (0.5% to 1% of your total oil weight) creates a physical barrier on the soap's surface that blocks CO2 from reaching the unreacted lye. Melt the beeswax into your oils before adding the lye water.
Beeswax also adds hardness and a subtle sheen to finished bars. The trade-off is that it reduces lather slightly and isn't suitable for vegan soap recipes. It can also accelerate trace, so add your fragrance and colorants before incorporating beeswax, and be ready to pour quickly.
7. Reduce Airflow During Curing
Even after unmolding, fresh soap can develop soda ash during the first week or two of curing. Placing your bars in an enclosed (but not airtight) space for the first few days helps. A cardboard box with the lid slightly open works well.
Avoid curing soap near open windows, fans, or HVAC vents during those early days. After the first week, airflow is actually beneficial for curing because it helps water evaporate, but by then the surface has hardened enough that soda ash is much less likely.
Prevention Methods at a Glance
| Method | Effectiveness | Difficulty | Notes |
| --- | --- | --- | --- |
| Force gel phase | Very high | Easy | Best single method; wrap and insulate |
| Isopropyl alcohol spray | High | Very easy | Great for textured tops you can't cover |
| Water discount | High | Easy | Use the Soaply calculator to dial it in |
| Higher soaping temps | Moderate | Easy | Aim for 100 to 130°F for both lye and oils |
| Sodium lactate | Moderate | Easy | 1 tsp per pound of oils in cooled lye water |
| Beeswax | Moderate | Moderate | Not for vegan recipes; speeds trace |
| Reduce airflow while curing | Low to moderate | Easy | Box your bars for the first few days |
Most soapmakers settle on a combination of gel phase + alcohol spray + a light water discount. That trio handles soda ash in the vast majority of recipes and conditions.
How to Remove Soda Ash from Finished Bars
If soda ash already appeared on your bars, don't worry. These three methods will clean them up.
Steam It Off
A handheld clothes steamer is the fastest and cleanest way to remove soda ash. Hold the steamer 1 to 3 inches above each bar and pass over the surface slowly for about 20 to 30 seconds per side. The steam melts the sodium carbonate crystals back into the soap surface.
Let the bars dry completely before packaging or handling them. The soap will look shiny and smooth once it dries. This method works best on light to moderate soda ash. For really thick layers, you might need a second pass.
If you make soap regularly, a small handheld steamer pays for itself fast. You can find one for about $15 to $25 online.
Wash It Off
Put on gloves and run each bar under cold water. Gently rub the ashy areas with your fingers or a soft cloth. The soda ash dissolves quickly. Rinse off any lather that forms, set the bars on a drying rack, and let them air dry for a day or two before using or packaging.
This works well for small batches. For larger batches, steaming is faster and wastes less soap.
Plane or Trim It
For thick, stubborn soda ash, you can use a soap beveler or vegetable peeler to shave a thin layer off the surface. This is the nuclear option, but it works every time and can actually give your bars clean, beveled edges that look professional.
This method does remove a small amount of soap, so it's best saved for cases where steaming or washing didn't fully do the job.
Which Recipes Are Most Prone to Soda Ash?
Some recipes attract soda ash more than others. Knowing which ones are high risk lets you prepare in advance.
High risk recipes:
- High olive oil (60%+) recipes like Castile soap. Olive oil saponifies slowly, leaving more unreacted lye at the surface for longer.
- Full water recipes with no water discount. More water equals more surface moisture for CO2 to react with.
- Recipes soaked at low temperatures (below 90°F). Cool batter doesn't push through saponification fast enough.
- Milk soaps, especially goat milk soap. Milk sugars can cause overheating if you gel, but avoiding gel phase to prevent scorching invites soda ash. It's a balancing act.
Lower risk recipes:
- Recipes with 30%+ hard fats (coconut oil, tallow, palm oil). These saponify quickly and generate more heat.
- Recipes using a water discount of 33% lye concentration or higher.
- Recipes that go through full gel phase.
- Salt bar soap. The salt accelerates hardening and the bars set up fast.
If you're working with a high risk recipe, just stack your prevention methods. Force gel phase, spray with alcohol, and use a moderate water discount. That combination handles even the most ash-prone formulas.
Can You Use Soda Ash as a Design Element?
Some soapmakers actually welcome soda ash. It can create a beautiful, rustic, frosted look on certain designs. If you're going for a natural, farmhouse aesthetic, a light coating of soda ash adds character.
A few ideas:
- Rustic bars: Leave the top textured with peaks and allow soda ash to form naturally. It highlights the texture and gives an artisan look.
- Two-tone effect: Ash the top only (by covering the sides with the mold) for a contrast between the clean sides and frosted top.
- Controlled ash: Some makers spray only part of the top with alcohol, allowing ash to form in specific patterns or sections.
If you're selling at craft fairs, leaning into the soda ash look with labels like "rustic finish" or "natural farmhouse style" can actually become a selling point. Check our guide on how to sell handmade soap for more tips on positioning your products.
💬 Frequently Asked Questions
Is soda ash the same as lye on the surface of soap?
No. Soda ash is sodium carbonate, which forms when sodium hydroxide (lye) reacts with carbon dioxide in the air. It's a different compound from lye and is not caustic. Soda ash is harmless and the soap is safe to use. If you're concerned about unreacted lye in your soap, do a pH test or zap test instead.
Does soda ash mean my soap recipe is wrong?
Not at all. Soda ash can happen to any cold process soap recipe regardless of how well it's formulated. It's caused by environmental factors like temperature, humidity, and air exposure, not by incorrect lye or oil amounts. Even experienced soapmakers get soda ash occasionally. Run your recipe through the Soaply calculator to make sure your ratios are correct, but don't blame the formula for ash.
Will soda ash go away on its own during curing?
Sometimes a very light dusting fades during the 4 to 6 week curing period, but heavier deposits typically stay put. Don't count on curing alone to fix it. If you want clean-looking bars, remove the ash with steam or washing after the first week of curing, then let the bars continue curing as normal.
Can soda ash form on melt and pour soap?
No. Soda ash only forms on cold process and hot process soap because those methods involve active lye reacting during the setting period. Melt and pour soap uses a pre-made base where saponification is already complete, so there's no unreacted lye to react with CO2.
Does covering soap with plastic wrap prevent soda ash?
Plastic wrap pressed directly onto the soap surface can prevent soda ash, but it often sticks and pulls up your design when you remove it. A better approach is to spray with 99% isopropyl alcohol and then cover with cardboard or a cutting board placed just above the soap (not touching it). This blocks airflow without ruining your top design.
Soda ash is one of those soap making challenges that feels frustrating the first few times, but becomes a non-issue once you've got your prevention routine dialed in. Start with gel phase and an alcohol spray on your next batch, and you'll likely never see that white film again. Ready to tweak your water discount for extra protection? Pop your recipe into the Soaply calculator and experiment with the lye concentration settings.
Ready to Try It?
Use our free soap calculator to create your perfect recipe with real-time property predictions.
Open Calculator