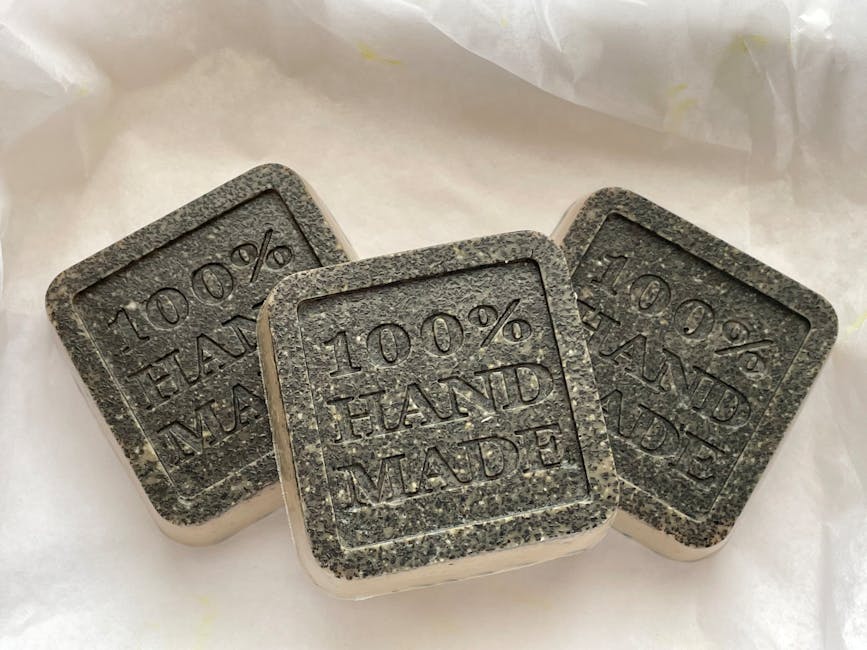
How to Make Activated Charcoal Soap (Cold Process Recipe)
Learn how to make activated charcoal soap at home with this cold process recipe. Includes usage rates, tips for perfect black bars, and skin benefits.
How to Make Activated Charcoal Soap (Cold Process Recipe)
Activated charcoal pulls dirt, oil, and impurities from your skin like a magnet. It's one of the most popular additives in handmade soap, and for good reason: it creates striking black bars that actually work. Here's how to make your own activated charcoal soap using the cold process method.
- What Is Activated Charcoal?
- Benefits of Charcoal in Soap
- How Much Activated Charcoal to Add to Soap
- Activated Charcoal Soap Recipe
- Step-by-Step Instructions
- Tips for Perfect Black Soap Bars
- Is Activated Charcoal Soap Good for Acne?
- Frequently Asked Questions
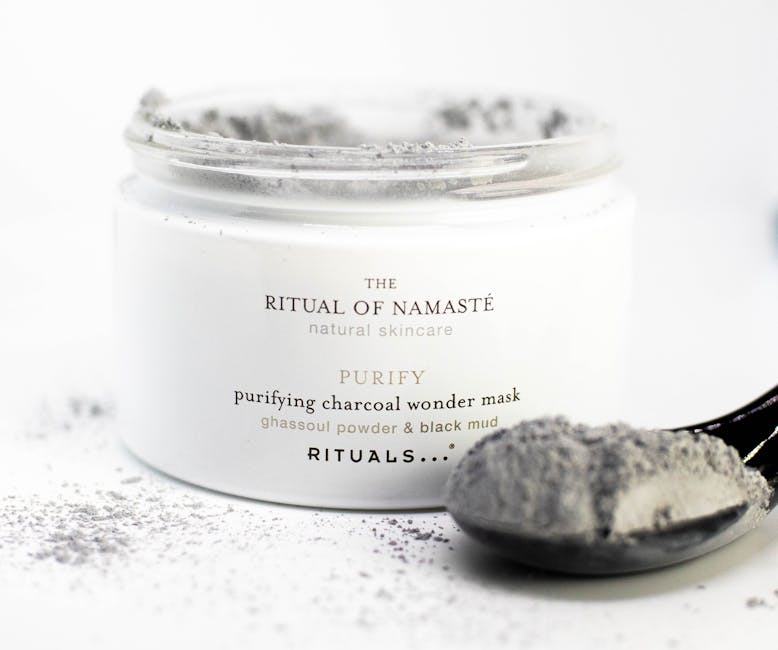
What Is Activated Charcoal?
Activated charcoal isn't the same stuff you throw on your grill. It's made by heating carbon-rich materials (coconut shells, wood, or bamboo) at extremely high temperatures, then treating them with steam or chemicals to create millions of tiny pores. Those pores give activated charcoal an enormous surface area, which is what makes it so good at trapping impurities.
In soap making, coconut shell activated charcoal is the most popular choice. It's finely milled, mixes easily into soap batter, and produces a deep, consistent black color.
Benefits of Charcoal in Soap
Activated charcoal brings more than just a cool color to your soap bars. Here's what it actually does:
Deep cleansing. The porous structure of activated charcoal binds to dirt, excess oil, and toxins on the skin's surface. It doesn't absorb into your skin; it works on the surface to lift away grime.
Oil control. If you've got oily or combination skin, charcoal soap can help balance sebum production without stripping your skin dry. It pulls excess oil while leaving behind the moisture your skin needs.
Gentle exfoliation. Finely ground charcoal provides mild physical exfoliation. It's not as abrasive as pumice or walnut shell, which makes it suitable for facial bars.
Minimizes the appearance of pores. By removing buildup from pores, charcoal soap can make them look smaller over time. It won't actually shrink your pores (nothing can), but cleaner pores look tighter.
Natural colorant. Charcoal gives soap a dramatic black or dark gray color that's completely natural and skin-safe. It's perfect for creating contrast in swirl designs.
How Much Activated Charcoal to Add to Soap
This is the question every soap maker asks, and the answer depends on how dark you want your bars.
Here's a quick reference:
| Usage Rate | Color Result | Best For |
| ------------ | ------------- | ---------- |
| 1/2 tsp per pound of oils | Light gray | Subtle tint, swirl accent |
| 1 tsp per pound of oils | Medium gray | Everyday charcoal bars |
| 1 tbsp per pound of oils | Dark gray/black | Bold, dramatic bars |
| 2 tbsp per pound of oils | Jet black | Maximum color impact |
Start with 1 teaspoon per pound of oils if you're making charcoal soap for the first time. You can always go darker next batch, but you can't lighten a bar that's too dark.
A few things to keep in mind:
- More charcoal means more potential for skin staining during use (it rinses off, but your washcloth might get gray)
- Very high usage rates can make the soap feel slightly drying
- The color darkens during cure, so freshly cut bars will look lighter than the finished product
Use our Soaply calculator to figure out your total oil weight, then calculate charcoal amounts from there.
Activated Charcoal Soap Recipe

This recipe makes about 6 bars of moisturizing charcoal soap with good lather and a firm bar.
Oil Blend
| Oil | Percentage | Purpose |
| ----- | ----------- | --------- |
| Olive Oil | 35% | Moisturizing, gentle |
| Coconut Oil (76°) | 30% | Cleansing, lather, hardness |
| Shea Butter | 15% | Conditioning, creaminess |
| Sweet Almond Oil | 10% | Skin-loving, silky feel |
| Castor Oil | 10% | Bubbly lather boost |
Additional Ingredients
- Lye concentration: 33% (2:1 water to lye ratio)
- Superfat: 5%
- Activated charcoal: 1 tbsp per pound of oils (for dark black bars)
- Tea tree essential oil: 0.7 oz per pound of oils (optional, great for acne-prone skin)
- Kaolin clay: 1 tsp per pound of oils (optional, anchors the scent)
Plug your oil weights into the Soaply calculator to get exact lye and water amounts. Don't try to calculate lye by hand.
Predicted Bar Properties
Based on this oil blend, your bars will score well across all categories:
- Hardness: Good (coconut + shea provide structure)
- Cleansing: Moderate-high (30% coconut)
- Conditioning: High (olive + almond + shea)
- Bubbly lather: Good (coconut + castor combo)
- Creamy lather: Good (shea butter contribution)
Check our soap bar properties guide for more on how different oils affect your finished bars.
Step-by-Step Instructions
Prep Your Charcoal
Before you start mixing, prepare your charcoal. You've got two options:
Option A: Mix with oil. Blend 1 tbsp charcoal into 1 tbsp of lightweight oil (sweet almond or olive). This creates a smooth paste that incorporates evenly with no clumps. This is the method I recommend for beginners.
Option B: Mix with water. Stir charcoal into a small amount of distilled water to create a slurry. This works fine but can be messier.
Don't add dry charcoal powder directly to your soap batter. It'll clump, and you'll spend forever trying to blend it out.
Make Your Lye Solution
- Weigh your distilled water in a heat-safe container
- Weigh your lye (sodium hydroxide) separately
- Slowly pour the lye into the water while stirring (never water into lye!)
- Stir until completely dissolved
- Set aside to cool to around 100-110°F
If you're new to working with lye, read our soap making safety guide first. Wear goggles and gloves, always.
Prepare Your Oils
- Weigh out coconut oil and shea butter, melt gently in a double boiler or microwave
- Add olive oil, sweet almond oil, and castor oil
- Cool the oil blend to 100-110°F
Getting your oils and lye solution within 10°F of each other gives the best results.
Combine and Blend
- Pour the lye solution into your oils
- Use a stick blender to mix, alternating between short bursts and stirring
- Blend until you reach light trace (the batter leaves a faint trail on the surface)
- Add your charcoal paste and essential oils
- Blend briefly to incorporate evenly
Don't over-blend after adding charcoal. It'll thicken your batter fast. A few pulses of the stick blender plus some hand stirring is plenty.
Pour and Mold
- Pour the batter into your silicone mold or lined wooden mold
- Tap the mold on your counter a few times to release air bubbles
- If the batter is thick enough, texture the top with a spoon or spatula
- Cover with a piece of cardboard and wrap with a towel to insulate
Unmold and Cure
- Let the soap sit in the mold for 24-48 hours
- Unmold and cut into bars
- Place bars on a rack with space between them for airflow
- Cure for 4-6 weeks, flipping bars once a week
Charcoal soap doesn't need any special curing considerations. The standard 4-6 week cure applies. Check our guide to curing soap if you want the full science behind why curing matters.
Tips for Perfect Black Soap Bars
Pre-mix your charcoal. This is worth repeating. Dry charcoal in soap batter equals clumps. Always pre-mix with oil or water first.
Use cosmetic-grade charcoal. Not all activated charcoal is the same. Cosmetic-grade charcoal is more finely milled and produces smoother bars. Food-grade works too, but avoid anything labeled for aquarium or industrial use.
Work quickly at trace. Charcoal accelerates trace slightly. Have your mold ready before you start blending, especially if you're also adding fragrance oils.
Don't gel if you want matte black. Charcoal soap that goes through gel phase can develop a slightly different shade than ungelled soap. If you want consistent matte black bars, put your mold in the fridge for 24 hours after pouring (this is called "freezer technique" or forcing no-gel).
Clean up immediately. Charcoal stains everything. Wipe down your work surface and wash tools right after pouring. It's much harder to clean once it dries.
Try a charcoal and white swirl. Split your batter before adding charcoal. Add charcoal to one portion and leave the other plain white. Pour alternating layers and use a skewer to create a dramatic swirl pattern. Check our soap swirl techniques guide for detailed swirl methods.
Is Activated Charcoal Soap Good for Acne?
Charcoal soap can help with acne-prone skin, but it's not a miracle cure. Here's what the evidence actually supports:
Activated charcoal's ability to absorb excess oil and draw out impurities from pores makes it useful as part of an acne care routine. Pair it with tea tree essential oil (which has well-documented antibacterial properties) for the best results.
That said, charcoal soap alone won't clear severe acne. It works best for:
- Mild breakouts caused by excess oil
- Clogged pores and blackheads
- General skin congestion
For the best results, use your charcoal soap bar on your face once daily (twice can be too drying for some skin types). Follow up with a good moisturizer.
If you've got sensitive skin, start with a lower charcoal usage rate (1/2 tsp per pound of oils) and see how your skin responds before going darker.
Creating Charcoal Soap Designs
One of the best things about charcoal in soap is its versatility as a design element. The deep black contrasts beautifully against lighter colors.
Black and white classic. The most popular design. Split your batch, add charcoal to half, and create layers or swirls. It's simple but stunning.
Charcoal gradient. Divide your batter into 3-4 portions. Add increasing amounts of charcoal to each portion (none, 1/4 tsp, 1/2 tsp, 1 tsp per pound). Pour from lightest to darkest for a gradient effect.
Charcoal embed. Make a batch of plain charcoal soap, cure it, then cut small shapes. Embed these shapes in a contrasting soap batch for a surprise design when cut.
Gold and black luxury. Pour a charcoal soap base and top with gold mica powder. This creates a luxurious look that sells incredibly well at craft fairs and markets.
💬 Frequently Asked Questions
What's the difference between charcoal and activated charcoal for soap?
Regular charcoal is simply burned organic material. Activated charcoal has been processed at high temperatures to create a porous structure with a much larger surface area. For soap making, always use activated charcoal because it's finer, safer for skin, and actually provides the cleansing benefits you're looking for.
Will charcoal soap stain my skin or bathtub?
It can leave temporary gray marks on washcloths and light-colored surfaces, but it rinses off skin completely. To minimize staining, rinse your tub or shower after use. Most soap makers find staining is only an issue with very high charcoal usage rates (2+ tablespoons per pound of oils).
Can I add activated charcoal to melt and pour soap?
Yes! Stir 1/2 to 1 teaspoon of charcoal per pound of melt and pour base after melting. It won't have the same deep cleansing benefits as cold process (since M&P is already saponified), but you'll get the color and mild exfoliation. Check our melt and pour guide for the full process.
How long does activated charcoal soap last?
Properly cured charcoal soap lasts 12-18 months when stored in a cool, dry place. The charcoal itself doesn't expire or lose effectiveness. Shelf life mostly depends on the oils in your recipe; oils high in linoleic acid (like sunflower) go rancid faster than stable oils like coconut or olive.
Does charcoal soap help with body odor?
Charcoal's ability to absorb impurities extends to odor-causing bacteria on the skin's surface. Many people find charcoal soap effective for underarm and foot odor. Pair it with tea tree or eucalyptus essential oils for extra odor-fighting power.
Time to Make Your First Batch
Activated charcoal soap is one of the most rewarding projects in soap making. The bars look professional, they're genuinely useful for oily and acne-prone skin, and they sell well if you're building a soap business.
Grab your oils, measure your lye with the Soaply calculator, and start with the recipe above. Your first batch of jet black bars is just a few weeks of cure time away.
Ready to Try It?
Use our free soap calculator to create your perfect recipe with real-time property predictions.
Open Calculator