How to Make Whipped Soap (Fluffy Cold Process Recipe)
Learn how to make whipped soap with this cold process recipe. Covers whipping technique, oil ratios, temperature tips, and a tested formula for light and fluffy bars.
How to Make Whipped Soap (Fluffy Cold Process Recipe)
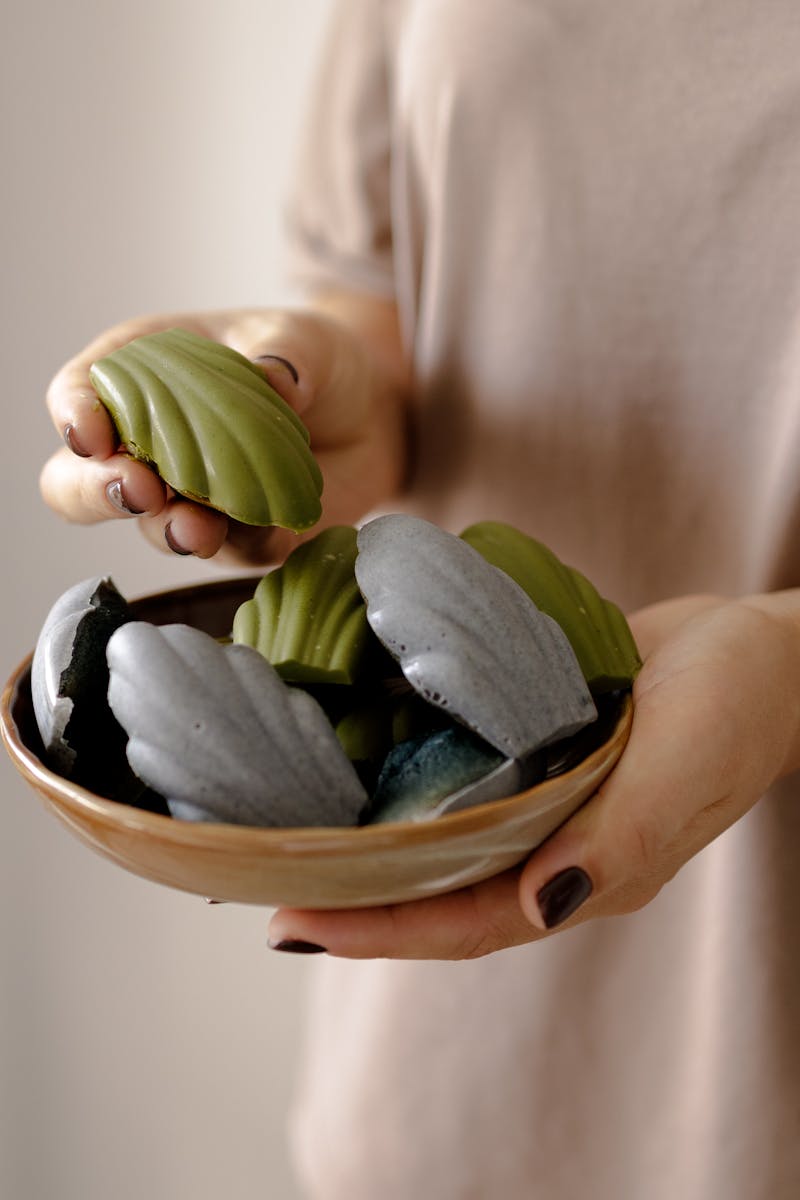
Whipped soap has a light, mousse-like texture that feels completely different from a standard bar. By whipping air into your soap batter before it sets, you create bars that float in water, lather quickly, and have a smooth, creamy feel on the skin.
- What Is Whipped Soap?
- Two Methods: Cold Process vs Foaming Bath Butter
- Whipped Cold Process Soap Recipe
- Equipment You'll Need
- Step-by-Step Instructions
- Tips for Better Whipped Soap
- Troubleshooting Common Problems
- Fragrance and Color Ideas
- Frequently Asked Questions
What Is Whipped Soap?
Whipped soap is exactly what it sounds like: soap batter that has been whipped with air before molding. The trapped air bubbles give the finished bar a lighter density and a softer, almost frosting-like appearance on top.
There are two main approaches. The first uses traditional cold process soap making with an extra whipping step. The second uses a premade foaming bath butter base (sometimes called Crystal OPC) that you whip with a mixer and customize with oils and fragrance. This guide focuses on the from-scratch cold process method, since it gives you full control over your ingredients.
Two Methods: Cold Process vs Foaming Bath Butter
Cold Process Whipped Soap
This method starts the same way as regular cold process soap making. You combine oils and lye water, then instead of pouring immediately at trace, you whip the batter with an electric mixer. The result is a lighter, fluffier bar that still goes through full saponification.
Pros:
- Full control over every ingredient
- True soap (not a detergent-based product)
- Bars float in water
- Unique frosted appearance
Cons:
- Requires careful temperature management
- Shorter working time once you start whipping
- Takes practice to get the right consistency
Foaming Bath Butter Method
This uses a surfactant-based soap base that you whip like frosting and customize with carrier oils, fragrance, and color. It does not involve lye.
Pros:
- No lye handling required
- Very beginner-friendly
- Consistent results
Cons:
- Less control over the base ingredients
- Not a true soap (surfactant-based)
- Ongoing cost of buying the base
Both methods work well. If you already make cold process soap and want to try something new, the CP whipped method is a natural next step.
Whipped Cold Process Soap Recipe
This recipe uses a higher percentage of solid fats, which helps the whipped batter hold its shape. Run these exact weights through the Soaply lye calculator to confirm your lye and water amounts.
Oil Formula (makes roughly 2 lbs)
| Oil | Weight | Percentage |
| ----- | -------- | ----------- |
| Coconut Oil (76 degree) | 10 oz | 35% |
| Palm Oil | 8.5 oz | 30% |
| Shea Butter | 4.3 oz | 15% |
| Olive Oil | 4.3 oz | 15% |
| Sweet Almond Oil | 1.4 oz | 5% |
- Superfat: 5%
- Water as % of oils: 33%
- Fragrance load: 6% (about 1.7 oz for this batch)
The high ratio of solid fats (80% coconut, palm, and shea) is intentional. Liquid-heavy recipes will not hold whipped peaks well. If you want to swap oils, keep at least 70% solid fats. Check our complete oil guide for substitution ideas.
Equipment You'll Need
- Stand mixer or hand mixer with whisk attachment
- Large stainless steel mixing bowl
- Digital kitchen scale
- Stick blender (for initial emulsion only)
- Infrared thermometer or candy thermometer
- Soap molds or a lined loaf mold
- Lye-safe containers and utensils
- Safety gear: goggles, gloves, long sleeves
The stand mixer is the key difference from standard cold process. You need sustained whipping power to incorporate air into the batter. A hand mixer works too, but it takes longer and your arm will thank you for investing in a stand mixer.
Step-by-Step Instructions
Step 1: Prepare Your Lye Solution
Measure your water and lye by weight (use the Soaply calculator for exact amounts). Slowly add the lye to the water in a well-ventilated area. Stir until dissolved and set aside to cool. For a thorough overview of lye safety, read our soap making safety guide.
Step 2: Melt and Cool Your Oils
Melt the coconut oil, palm oil, and shea butter together. Add the olive oil and sweet almond oil to cool the mixture down. You want both your lye solution and oils to reach room temperature or slightly below (70-80 F). This is critical for whipped soap because cooler temperatures give you more working time.
Step 3: Reach Light Trace
Pour the lye solution into the oils and use a stick blender in short bursts to reach a very light trace. The batter should look like thin pudding. Do not over-blend. You need the batter thin enough to whip air into it. If it gets too thick, you will not be able to incorporate air evenly.
Step 4: Whip the Batter
Transfer the batter to your stand mixer bowl (or keep it in a large bowl if using a hand mixer). Using the whisk attachment, start on low speed and gradually increase to medium-high. Whip for 5-10 minutes until the batter:
- Increases in volume by roughly 50%
- Looks like thick frosting or whipped cream
- Holds soft peaks when you lift the whisk
The batter will lighten in color as air gets folded in. Keep an eye on the consistency. If it starts to thicken too rapidly (accelerating trace), stop whipping immediately.
Step 5: Add Fragrance and Color
Fold in your fragrance oil and any colorants by hand with a spatula. Avoid the stick blender at this stage since it will knock out the air you just whipped in. Work quickly but gently.
If you want a swirl, split the batter and color each portion before folding them together in the mold. Our soap swirl techniques guide covers several patterns.
Step 6: Mold and Freeze
Spoon or pipe the whipped batter into molds. You can smooth the top or leave it textured for a frosted look. Place the filled molds in the freezer for 24 hours. Freezing prevents gel phase and helps the whipped soap keep its light, airy structure.
Step 7: Unmold and Cure
After 24 hours in the freezer, remove the molds and let the soap come to room temperature before unmolding. Cut into bars if using a loaf mold. Cure for 4-6 weeks on a rack with good airflow, just like regular cold process soap.
Tips for Better Whipped Soap
Temperature is everything. Work at 70-80 F for both oils and lye water. Warm batter accelerates trace and gives you less time to whip. Some soapmakers chill their batter to 65 F for extra working time.
Use a slow-tracing recipe. Oils like coconut and palm can accelerate trace. The olive oil and almond oil in this recipe help slow things down. Avoid castor oil in whipped soap since even small amounts speed up trace significantly.
Skip fragrance oils that accelerate trace. Floral fragrances (especially anything with clove, cinnamon, or jasmine) tend to seize batter fast. Stick with safe options like lavender, citrus, or clean/fresh scents for your first batch. Check our fragrance load guide for more tips.
Do not insulate the mold. Regular cold process recipes often benefit from insulation to promote gel phase. Whipped soap should skip gel entirely. Gel phase will collapse all the air bubbles you worked to create. Freeze instead.
Pipe for decoration. Once whipped, the batter handles like thick frosting. Use a piping bag with a large star tip to create decorative tops. Work fast because saponification is still happening.
Troubleshooting Common Problems
Batter Seized While Whipping
Your temperatures were too high, or you reached too thick a trace before whipping. Next time, blend to a thinner trace and make sure everything is at room temperature.
Bars Are Dense (Not Fluffy)
You did not whip long enough, or the batter was too thick when you started. The mixer needs 5-10 solid minutes of whipping at medium-high speed to incorporate enough air.
Soap Collapsed After Unmolding
Gel phase happened. Make sure you freeze the molds for a full 24 hours and do not insulate them. Also check that your recipe has enough hard oils to hold structure.
Uneven Air Pockets
You mixed fragrance or color too aggressively and knocked air out of some areas. Fold gently with a spatula instead of stirring.
Soap Does Not Float
The density is still too high. Increase whipping time or try cooling the batter further before whipping to incorporate more air.
Fragrance and Color Ideas
Whipped soap looks beautiful with soft pastel colors and light, fresh scents. Some combinations that work well:
- Lavender and purple mica - A classic that never disappoints. See our lavender soap guide for more ideas.
- Peppermint and green oxide - Fresh and clean, perfect for a spa feel
- Vanilla and warm beige - Cozy and inviting (use vanilla stabilizer to prevent browning)
- Lemon and yellow mica - Bright and cheerful, a good summer bar
- Unscented with white kaolin clay - A pure, minimalist bar for sensitive skin
Natural colorants work here too, but test in small batches first. Some botanicals can speckle unevenly in whipped batter. Our natural colorants guide covers what to expect from each option.
💬 Frequently Asked Questions
Does whipped soap really float in water?
Yes. When enough air is whipped into the batter, the finished bars have a lower density than water and will float. The amount of air incorporated determines whether a bar floats or sinks. Aim for about 50% volume increase during whipping.
How long does whipped soap last compared to regular bars?
Whipped soap lasts about the same time as regular cold process soap when stored properly. Because the bars are less dense, they may feel like they dissolve a bit faster in heavy use. Keeping them on a well-draining soap dish helps.
Can I make whipped soap without a stand mixer?
A hand mixer with a whisk attachment works fine. It just takes more time and effort. A stick blender alone will not work because it does not incorporate air the same way a whisk does.
Is whipped soap safe for sensitive skin?
The same oil recipe used in regular cold process soap is used here, so the skin-contact properties are identical. The only difference is the texture from trapped air. If you want a gentle formula, check our sensitive skin soap recipe.
Can I use melt and pour base to make whipped soap?
Not in the same way. Melt and pour base does not hold whipped air well because it re-solidifies as it cools rather than going through saponification. For melt and pour projects, see our melt and pour guide.
Try Your First Whipped Batch
Whipped soap is a fun technique that produces bars with a texture and appearance that stand out. The key is working at cool temperatures, blending to a light trace, and whipping thoroughly before the batter thickens.
Plug your oil weights into the Soaply calculator to get exact lye and water amounts, then grab your stand mixer and give it a try. For more recipe inspiration, check out our castile soap guide, salt bar recipe, or shampoo bar tutorial.
Ready to Try It?
Use our free soap calculator to create your perfect recipe with real-time property predictions.
Open Calculator