How to Rebatch Soap: Save Failed Batches and Create Custom Bars
Learn how to rebatch (hand mill) soap step by step. Fix mistakes, rescue ugly bars, and add delicate ingredients with this beginner-friendly rebatching guide.
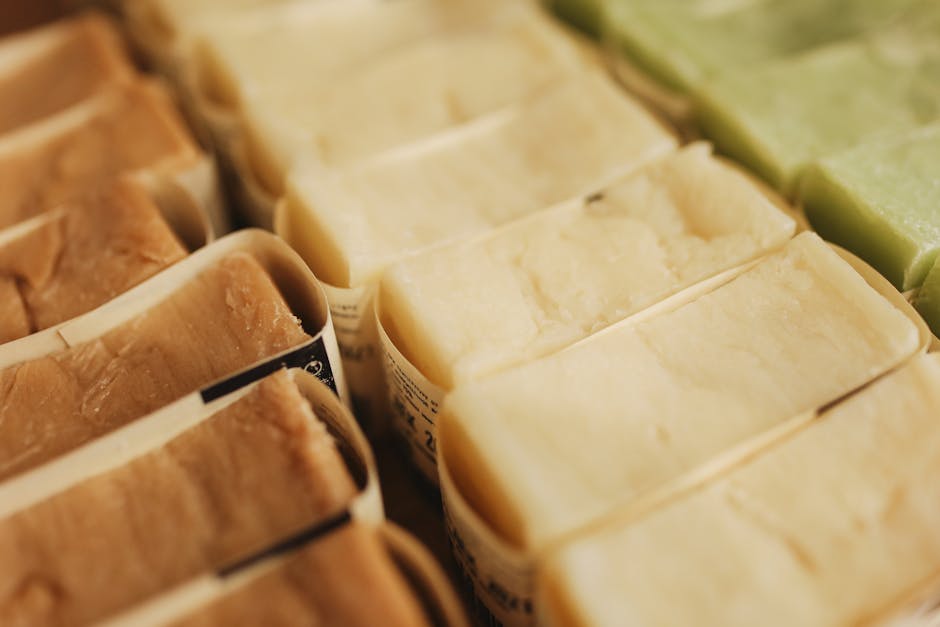
That batch of cold process soap didn't turn out right. Maybe the fragrance seized, the colors went muddy, or you forgot an oil entirely. Don't toss it. Rebatching lets you melt it down, fix it up, and remold it into something you're actually proud of.
Rebatching (also called hand milling) works by grating finished soap, melting it with a little liquid, and pouring it into molds again. It's not just for fixing mistakes, either. You can use it to add heat-sensitive ingredients like dried flowers, jojoba beads, or delicate essential oils that would've been destroyed by fresh lye.
- What Is Rebatching?
- When Should You Rebatch Soap?
- Equipment You'll Need
- Step-by-Step Rebatching Instructions
- Choosing the Right Liquid
- Slow Cooker vs. Double Boiler vs. Oven
- Adding Fragrance, Color, and Extras
- Common Rebatching Mistakes to Avoid
- Frequently Asked Questions
What Is Rebatching?
Rebatching is the process of taking already-made soap, breaking it down with heat and liquid, then reshaping it in molds. Since saponification is already complete, the lye has been fully consumed. That means you're working with actual soap, not a caustic mixture.
This makes rebatching much safer than working with fresh lye. You still want gloves (melted soap is hot), but you won't need the full safety gear that cold process soap making requires.
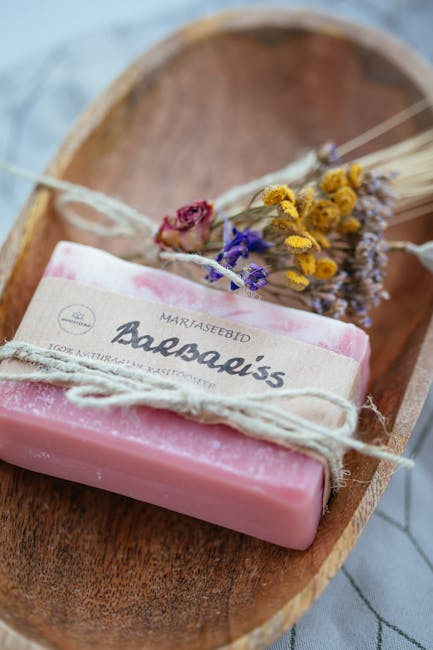
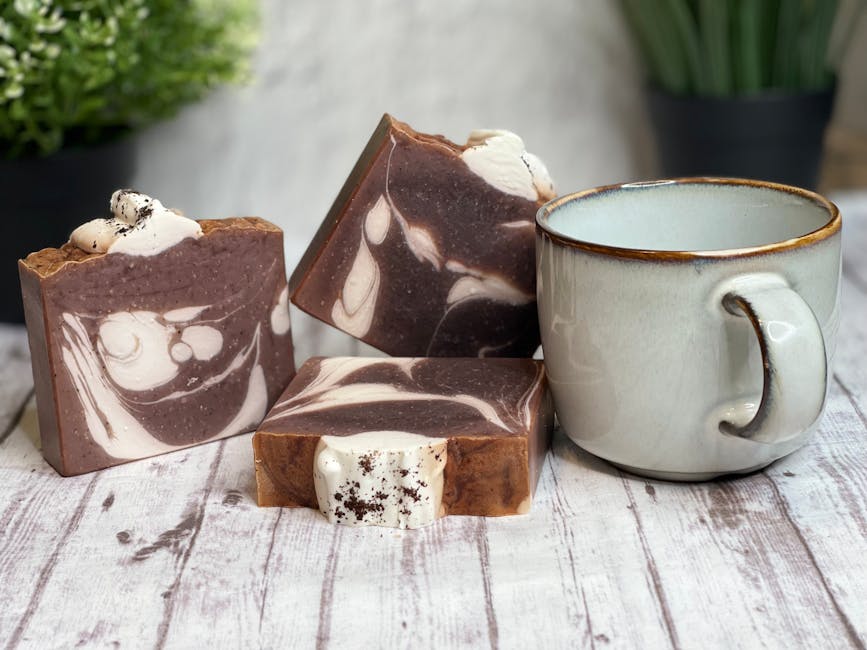
The trade-off? Rebatched bars have a slightly rustic texture. They won't look as smooth as a freshly poured cold process bar, but they'll clean just as well and you can add some really interesting visual effects with embedded chunks or swirls.
When Should You Rebatch Soap?
Not every failed batch needs rebatching. Here's when it actually makes sense:
Good reasons to rebatch:
- Your fragrance oil seized the batch and it looks lumpy
- Colors turned out wrong or went muddy
- You forgot an oil or additive
- You want to add ingredients that don't survive fresh lye (lavender buds, jojoba beads, certain essential oils)
- You have soap scraps piling up and want to combine them
- You're testing new fragrances without making full batches from scratch
Don't rebatch if:
- The soap is lye-heavy (it'll still be lye-heavy after rebatching)
- You're not sure what went wrong
- The batch has DOS (dreaded orange spots) from rancid oils
If you think your soap might be lye-heavy, do a zap test first. Touch the soap to your tongue briefly. If it zaps like a 9-volt battery, that soap has excess lye and rebatching won't fix it. Check our troubleshooting guide for more help identifying problems.
Equipment You'll Need
You probably already own most of these:
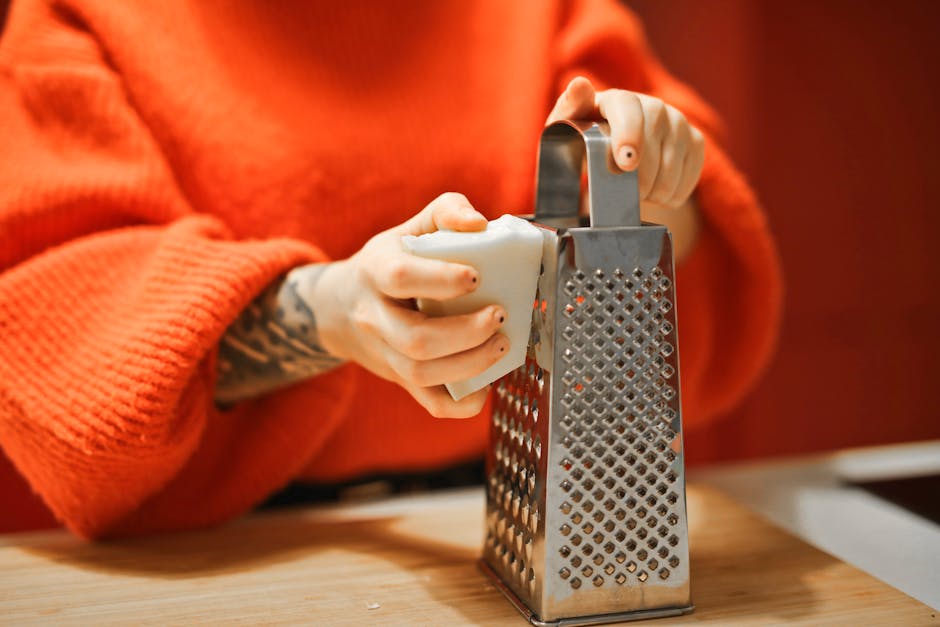
- Cheese grater or food processor for breaking down the soap
- Slow cooker (preferred method), double boiler, or oven-safe dish
- Silicone soap molds for reshaping
- Heat-resistant spatula for stirring
- Liquid (water, milk, or other, more on this below)
- Spray bottle with rubbing alcohol to reduce air bubbles
- Kitchen scale for measuring liquid additions
No specialized equipment needed. That's one of the best things about rebatching.
Step-by-Step Rebatching Instructions
Step 1: Grate or Chop Your Soap
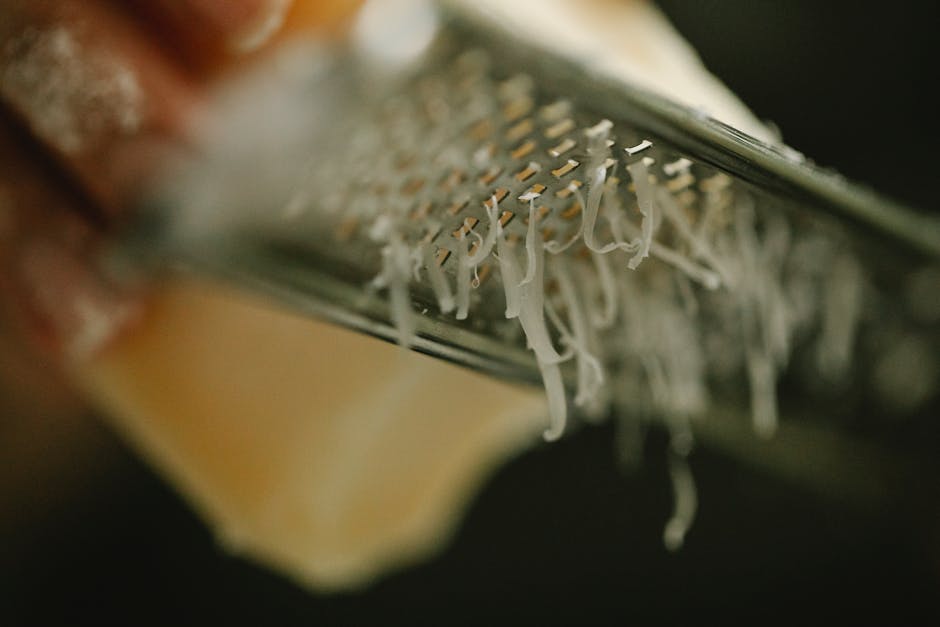
If the soap has cured for a few days and is firm, use the fine side of a box grater. The smaller the pieces, the faster and more evenly they'll melt. For soft, freshly unmolded soap, just cut it into small chunks with a knife.
A food processor works great for large batches. It'll save your arms and get more consistent pieces.
Pro tip: Freeze your soap for 30 minutes before grating. It'll be firmer and easier to handle.
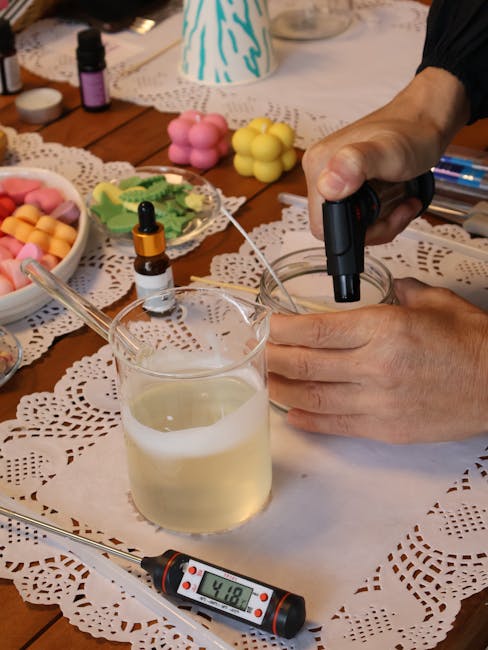
Step 2: Add Liquid
Place grated soap in your slow cooker and add liquid. Use about 1 tablespoon of liquid per pound of grated soap as a starting point. You can always add more, but you can't take it out.
Too much liquid is the most common rebatching mistake. It makes the soap soft, increases cure time, and can create bars that never fully harden. Start with less than you think you need.
Step 3: Heat and Melt
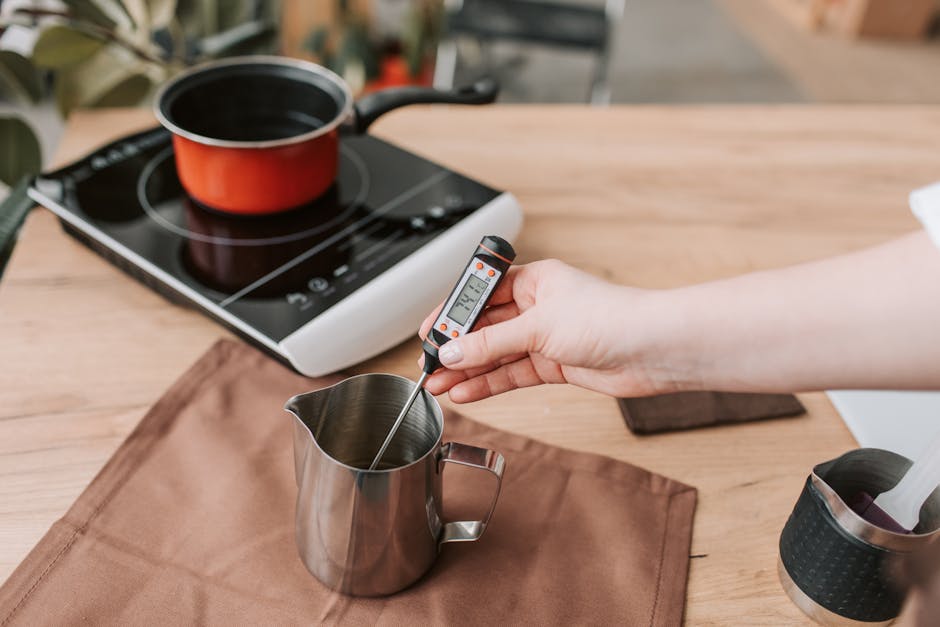
Set your slow cooker to low. Stir every 15-20 minutes. The soap will slowly soften into a thick, mashed-potato-like consistency. This usually takes 1-3 hours depending on how finely you grated it.
Don't crank the heat. High temperatures can scorch the soap and create brown spots. Patience is everything here.
Step 4: Check Consistency
You're looking for a thick but scoopable texture, similar to thick oatmeal. If there are still visible chunks, keep heating and stirring. If it's too thick to work with, add liquid one teaspoon at a time.
Step 5: Add Your Extras
Once the soap is fully melted and smooth-ish, remove from heat and stir in:
- Fragrance or essential oils
- Colorants
- Exfoliants, botanicals, or other additives
Work quickly. The soap will start to firm up as it cools.
Step 6: Mold It
Scoop (not pour, it's too thick for that) the soap into your molds. Press it down firmly with your spatula or gloved hands to eliminate air pockets. Spritz the top with rubbing alcohol to smooth it out and reduce bubbles.
Step 7: Unmold and Cure
Unmold after 24-48 hours. Since this soap has already gone through saponification, it technically doesn't need a full cure. But giving it 1-2 weeks of additional curing will let excess moisture evaporate, making harder, longer-lasting bars.
Choosing the Right Liquid
The liquid you add affects the final texture:
Water is the simplest option. It works fine and won't add any complications.
Goat milk or coconut milk helps the soap melt smoother and adds a creamy feel to the finished bar. Use it straight from the fridge. If you're interested in milk soaps, check out our milk soap guide.
Aloe vera juice adds skin-soothing properties and helps with melting.
Brewed tea or coffee can add natural color and gentle fragrance. Green tea gives a light tan, coffee provides brown tones.
Avoid: Anything with high sugar content (fruit juices) as they can cause the soap to overheat and scorch.
Slow Cooker vs. Double Boiler vs. Oven
Slow Cooker (Best for Most People)
The slow cooker is the most popular method for good reason. It provides even, gentle heat with minimal babysitting. Set it on low, stir occasionally, and let it do the work. A small 2-quart cooker is perfect for batches under 3 pounds.
Double Boiler
A double boiler gives you more temperature control but requires constant attention. Place grated soap in the top pot with your liquid. Keep water simmering (not boiling) in the bottom pot. Stir frequently. This method works well for small test batches.
Oven Method
Preheat your oven to 170°F (the lowest setting on most ovens). Place grated soap and liquid in an oven-safe dish, cover with foil, and check every 20 minutes. This is hands-off but harder to control. Works best if your oven holds a steady low temperature.
Adding Fragrance, Color, and Extras
This is where rebatching really shines. Since there's no active lye to worry about, you can add ingredients that wouldn't survive the cold process:
Fragrance: Add at about 0.7 oz per pound of soap. Since you're adding to already-made soap, fragrance retention is usually excellent. This is a great way to test new fragrance oils without committing to a full batch. Our fragrance load guide has detailed usage rates.
Botanicals: Dried lavender buds, rose petals, and calendula flowers keep their color and shape in rebatched soap. In cold process, lye turns most botanicals brown and mushy.
Exfoliants: Jojoba beads, poppy seeds, ground oats, and coffee grounds all work beautifully. They stay suspended better in thick rebatched soap than in pourable cold process.
Colorants: Micas, oxides, and natural colorants all work. Keep in mind the base soap color will affect your results. White or light soap gives the truest colors.
Common Rebatching Mistakes to Avoid
Using too much liquid. This is the number one mistake. Start with 1 tablespoon per pound and add more only if needed. Excess water makes soft, sticky bars.
Heating too fast. High heat scorches soap and creates dark spots. Low and slow is the way.
Rebatching lye-heavy soap. Rebatching doesn't change the chemistry. If there's too much lye, the soap will still be harsh after rebatching. Use our Soaply calculator to double-check recipes before deciding to rebatch.
Not pressing out air bubbles. Rebatched soap is thick and traps air easily. Press firmly into molds and tap them on the counter to release bubbles.
Expecting smooth bars. Rebatched soap has a rustic, textured look. Embrace it. Some soap makers actually prefer this aesthetic and market it as "hand-milled" or "artisan textured."
Skipping additional cure time. While the soap is safe to use immediately, giving it 1-2 weeks to dry out produces much better bars.
💬 Frequently Asked Questions
Can you rebatch melt and pour soap?
Technically yes, but it's not ideal. Melt and pour bases are designed to be melted once. Repeated heating degrades the glycerin content and affects lather quality. You're better off starting with a fresh melt and pour base. Check our melt and pour guide for tips.
How many times can you rebatch the same soap?
You can rebatch soap multiple times, but quality decreases with each round. The soap gets drier, less smooth, and harder to work with. Stick to one or two rebatches maximum for the best results.
Does rebatched soap need to cure?
The saponification is already complete, so it's technically safe to use right away. However, 1-2 weeks of curing lets excess moisture evaporate. This makes the bar harder, longer-lasting, and produces better lather. Learn more about why curing matters in our curing guide.
Can rebatching fix soap that's too soft?
It depends on why it's soft. If the recipe had too much liquid or a high percentage of soft oils, rebatching with less added liquid can help somewhat. If the recipe itself is unbalanced (too much olive oil and not enough hard oils), you'd need to add extra hard oils, which gets complicated.
What's the difference between rebatching and hot process soap?
Hot process soap cooks raw soap batter (oils + lye) until saponification is complete. Rebatching starts with finished soap and simply remelts it. Hot process is a soap-making method; rebatching is a correction or customization technique.
Make the Most of Every Batch
Rebatching isn't glamorous, but it's one of those skills every soap maker should have. It turns mistakes into usable bars, lets you experiment with delicate ingredients, and means you never have to throw away a batch again.
Got a pile of soap scraps? Grate them up, toss them in the slow cooker, and give them a second life. You might be surprised how good they turn out.
Ready to formulate your next batch? Use the Soaply calculator to get your recipe right the first time, so you won't need to rebatch at all.
Ready to Try It?
Use our free soap calculator to create your perfect recipe with real-time property predictions.
Open Calculator