Gel Phase in Soap Making: What It Is and How to Control It
Learn what gel phase is in cold process soap, how to force it or prevent it, and how to fix partial gel rings for cleaner, more vibrant bars.
Gel Phase in Soap Making: What It Is and How to Control It
Gel phase is the temperature spike your soap goes through after you pour it into the mold. It's the single biggest reason two batches of the same recipe can come out looking completely different. Learn how to read it, force it, or prevent it, and you'll get the finish you actually want every time.
- What Is Gel Phase in Cold Process Soap?
- What Happens to Soap During Gel Phase
- How to Tell If Your Soap Gelled
- Gel vs No Gel: Which Is Better?
- How to Force Gel Phase
- How to Prevent Gel Phase
- Partial Gel: The Ugly Ring Problem
- Soaping Temperatures and Gel Phase
- When to Force vs Prevent Gel
- Frequently Asked Questions
What Is Gel Phase in Cold Process Soap?
Gel phase is the period after you pour batter into the mold when saponification heats the soap to around 160 to 180°F (71 to 82°C). At those temperatures the soap turns translucent and gel-like in the center of the loaf, then cools and solidifies into a finished bar.
It's not a separate step you add. It's a chemical reality of the cold process method. You can either let it happen, push it harder, or stop it entirely, but every batch of cold process soap either goes through gel phase or it doesn't.
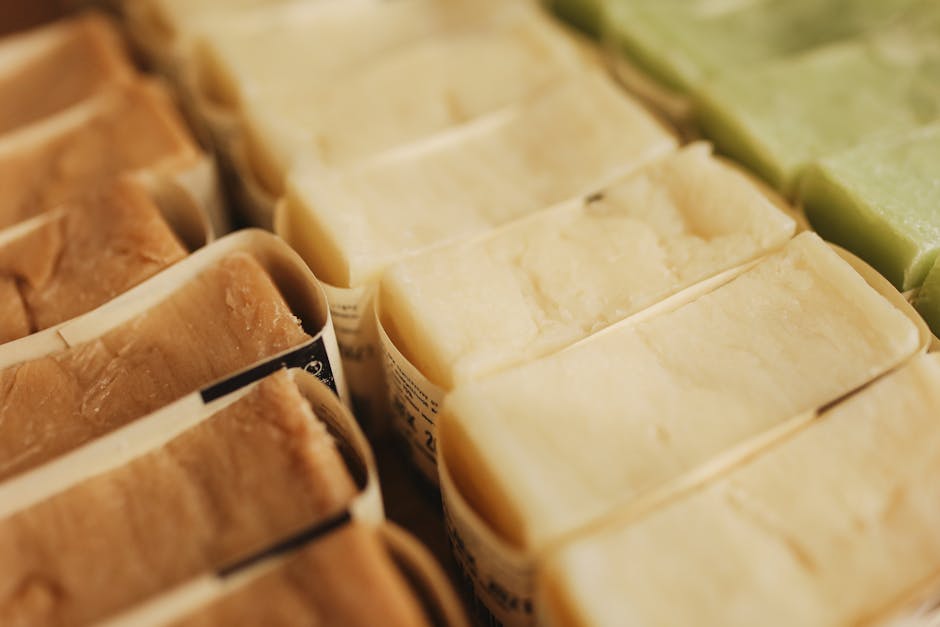
The decision matters because gel phase changes how the finished bar looks, feels, and unmolds. A fully-gelled bar has deeper colors, a slightly translucent finish, and unmolds faster. An un-gelled bar has muted, pastel colors, an opaque white finish, and needs longer in the mold.
What Happens to Soap During Gel Phase
Saponification is exothermic, which means the reaction generates heat on its own. Once the lye and oils are emulsified in the mold, that heat starts building. If it builds enough, the soap reaches a temperature where the soap molecules transition from a solid emulsion into a translucent gel.
Here's the sequence:
- Pour into mold. Soap is around 100 to 120°F.
- Heat builds. Saponification releases heat. Temperature rises slowly at first.
- Center hits gel temperature. Around 160 to 180°F, the soap in the center of the loaf becomes translucent and looks like petroleum jelly.
- Gel spreads outward. The hot center transfers heat to the edges. In a fully-insulated mold, the entire loaf gels.
- Cool down. Once saponification slows, the temperature drops back to room temperature and the gel solidifies into a finished bar.
The gel phase itself takes about 1 to 4 hours to complete, depending on batch size, recipe, and insulation. Bigger batches gel faster and more completely because more chemical reaction happens in a smaller relative surface area.
How to Tell If Your Soap Gelled
You'll know within the first few hours after pouring. Check the loaf 30 minutes after pour, then again every 30 to 60 minutes for the next few hours.
Visual cues that gel is happening:
- The center of the loaf looks darker and translucent, almost wet-looking
- A clear or amber-colored circle expands outward from the middle
- The surface feels warm to the touch (don't press, just hover your hand near it)
- Colors look more saturated than they did when you poured
Visual cues that gel is complete:
- The entire loaf is uniformly translucent
- No remaining opaque "halo" around the edges
- The soap has cooled back down to room temperature
- Colors are deep and saturated when you cut the loaf
If you only see translucence in the middle and an opaque ring around the outside after cooling, you got partial gel. We'll cover how to fix that further down.
Gel vs No Gel: Which Is Better?
Neither one is universally better. They produce different finished bars, and the right choice depends on your recipe and what you're trying to make.
| Property | Gelled Soap | Un-Gelled Soap |
| ---------- | ------------- | ---------------- |
| Color | Deep, saturated, vibrant | Muted, pastel, creamy |
| Finish | Slightly translucent, glossier | Opaque, matte |
| Unmold time | 12 to 24 hours | 36 to 72 hours |
| Hardness at unmold | Firmer | Softer, can dent easily |
| Final bar hardness | Same after cure | Same after cure |
| Cure time | Same (4 to 6 weeks) | Same (4 to 6 weeks) |
| Lather | Slightly faster to develop | Identical after cure |
| Risk of cracking | Higher in hot batches | Lower |
| Risk of overheating | Higher | Almost zero |
The bar performance after a full cure is essentially identical. The differences are mostly visual and structural at the unmold stage. Choose based on the look you want and the working conditions you have.
How to Force Gel Phase
Forcing gel phase is the easier of the two paths. Saponification wants to gel on its own. Your job is to insulate the heat so it builds enough to reach the gel temperature.
Cover the mold. Place a sheet of cardboard over the top to trap heat without touching the soap surface.
Wrap with towels. Put two or three thick towels over the mold. The thicker the wrap, the more heat stays in.
Place on a heating pad (CPOP method). Put the mold on a heating pad set to low for 1 to 2 hours, then turn off and let cool overnight. CPOP stands for cold process oven process, and it's the most reliable way to guarantee a full gel.
Use the oven method. Preheat your oven to 170°F, turn it off, then place the covered mold inside. The residual heat plus insulation will push the soap through full gel.
Use a bigger batch. A 4-pound loaf gels more reliably than a 1-pound batch because it generates more saponification heat per square inch of surface area.
Soap warmer. Pouring at 110 to 120°F instead of 90°F gives the batter a head start toward gel temperature.
Use sugar in the recipe. A teaspoon of sugar dissolved in the lye water per pound of oils accelerates saponification and pushes batches into gel more reliably. Use carefully because it can also cause overheating.
If you're trying to force gel and the loaf still won't gel, the room is probably too cold. Move the wrapped mold to a warmer spot like the top of the refrigerator or a closed bathroom with the heat on.
How to Prevent Gel Phase
Preventing gel takes more effort than forcing it because saponification naturally generates heat. You have to actively pull that heat away from the soap.
Refrigerate the mold. Place the soap in the fridge or freezer for the first 12 to 24 hours after pouring. This is the most reliable method.
Use individual cavity molds. Smaller bars have more surface area relative to volume, which lets heat escape faster. Single-cavity silicone molds rarely gel without insulation.
Soap cool. Pour at 90 to 100°F instead of 110°F. The lower starting temperature gives the batter further to climb before reaching gel temperature.
Don't cover the mold. Skip the cardboard, skip the towels. Leave the soap exposed to room air so heat dissipates.
Use a wide, shallow mold. A shallow slab mold loses heat faster than a deep loaf mold because the surface-to-volume ratio is higher.
Reduce sugar additives. Honey, milk, beer, fruit purees, and added sugar all accelerate saponification heat. Skip them or reduce the amount if you want to prevent gel.
Lower the lye concentration. A water-heavy recipe (28 to 30% lye concentration instead of 33%) generates less heat as the saponification reaction proceeds.
For milk soaps where you absolutely don't want gel, freezing the milk solid before adding lye plus refrigerating the finished mold for 24 hours is the standard combination that prevents scorching.
Partial Gel: The Ugly Ring Problem
Partial gel is when only part of the loaf reaches gel temperature. You'll see a darker, translucent circle in the middle and a lighter, opaque ring around the outside. It looks like a target on the cut bar.
The bar still works fine. There's no chemistry problem with partial gel. It's purely cosmetic. But that ring is hard to ignore once you see it, and it ruins decorative bars and gift soaps.
Why partial gel happens:
- Insulation wasn't enough to keep heat in the edges
- The room was too cold during the first 12 hours
- The mold material conducts heat too quickly (metal molds, silicone over wood)
- The batch was too small to generate enough heat to gel completely
How to fix partial gel after the fact:
You can't fully fix it. The ring is locked in once the soap cools. But you can hide it or even it out:
- CPOP rescue. Put the loaf back in a warm oven (170°F preheated and turned off) for 1 to 2 hours. This sometimes pushes the un-gelled edges through gel and evens the appearance.
- Plane the edges. Use a soap planer or potato peeler to shave off the outer un-gelled layer, leaving only the gelled interior visible.
- Embrace it. Some soapmakers leave partial gel as part of a rustic look.
The better fix is preventing partial gel from happening. Either commit to full gel (insulate harder) or commit to no gel (refrigerate). The middle path is what creates the ring.
Soaping Temperatures and Gel Phase
Pour temperature matters more for gel phase than most beginners realize. The hotter your batter when it goes into the mold, the closer it already is to gel temperature, which makes gel almost inevitable.
| Pour Temperature | Likely Result |
| ------------------ | --------------- |
| 80 to 95°F | Tends to skip gel without insulation |
| 95 to 105°F | Partial gel risk; either insulate or refrigerate |
| 105 to 115°F | Full gel with light insulation |
| 115 to 125°F | Full gel even without insulation |
| 125°F+ | Risk of overheating, volcano, or cracking |
For temperature-sensitive recipes (milk, honey, high-sugar fragrance oils), soaping at 80 to 95°F gives you the most control. For straightforward recipes where you want vibrant colors, soaping at 110 to 115°F simplifies the gel decision. Our soap making temperature guide covers this in more depth.
When to Force vs Prevent Gel
Some recipes benefit clearly from one approach or the other. Use this as a quick decision guide.
Force gel when:
- You're using bright micas or pigments and want vivid color
- You want the loaf to unmold the next day
- You're making a recipe that traditionally gels (lard, tallow, palm-heavy bars)
- You want a slight translucence in the finished bar
- You're soaping in a cold room and worried about partial gel
Prevent gel when:
- You're using milk, yogurt, or buttermilk (prevents scorching)
- You're using honey or beer (prevents overheating)
- You want a creamy, opaque finished bar
- You're using vanilla-heavy fragrance oils (heat accelerates browning)
- You're making a small test batch in individual cavity molds
Either is fine when:
- You're making a basic olive oil castile bar
- You're using earth pigments or clays for color
- You're new to soap making and want consistency over aesthetics
If you're not sure which to do, default to forcing gel for bigger loaves and preventing gel for individual molds. Big batches gel naturally and trying to fight that produces partial gel rings. Individual cavity molds rarely gel naturally so trying to force them often fails.
💬 Frequently Asked Questions
Does soap have to gel to be safe?
No. Saponification happens whether the soap gels or not. Gel phase is a temperature event during saponification, not the saponification reaction itself. Both gelled and un-gelled bars cure into safe, fully-saponified soap after 4 to 6 weeks. The only difference is appearance.
How long does gel phase last?
Gel phase typically lasts 1 to 4 hours, depending on batch size and insulation. A standard 2-pound loaf with cardboard and towel insulation will gel for about 2 hours. Larger or better-insulated batches gel longer. The soap is fully cooled and ready to unmold within 24 hours either way.
Can you over-gel cold process soap?
Yes. If a batch gets too hot during gel phase (above 200°F), it can volcano out of the mold, crack down the middle, or develop a chunky, separated texture called the alien brain effect. This usually happens with overly insulated, sugar-heavy recipes. If you see steam or expansion, uncover the mold immediately to let heat escape.
Why does my soap have a darker circle in the middle?
That's partial gel, and it means only the center of the loaf reached gel temperature while the edges stayed cool. It's purely cosmetic. To prevent it next time, either insulate more aggressively to push the whole loaf through gel or refrigerate immediately to prevent gel entirely. Don't split the difference.
Does forcing gel phase change the cure time?
No. Cure time depends on water evaporation and crystal structure development, neither of which is affected by gel phase. A gelled bar cures in the same 4 to 6 weeks as an un-gelled bar. You can usually unmold gelled soap a day sooner, but the actual cure timeline is identical.
Will soap colorants look different with gel?
Yes, often dramatically. Micas, pigments, and natural colorants like indigo and madder root produce deeper, more saturated colors when soap goes through full gel. Un-gelled bars often look pastel by comparison. If you're paying for premium natural colorants, forcing gel is usually worth it for the color payoff.
Get Gel Phase Working for You
Gel phase isn't something to fear. Once you understand what it is and how to control it, you can use it as a tool to get the look you want. Force it for bold colors and fast unmolding. Prevent it for milk soaps and creamy pastels. Avoid the middle ground where partial gel rings ruin good bars.
When you're planning a batch, run your recipe through the Soaply calculator to lock in your exact lye and water amounts, then decide before you pour whether you're forcing gel or preventing it. Commit to one or the other and your finished bars will come out looking the way you intended.
Ready to Try It?
Use our free soap calculator to create your perfect recipe with real-time property predictions.
Open Calculator