Soap Swirling Techniques for Beginners: 7 Methods You Can Try Today
Learn 7 easy soap swirl techniques for cold process soap. Step-by-step instructions for in-the-pot swirls, drop swirls, hanger swirls, and more with tips for clean lines.
Soap Swirling Techniques for Beginners: 7 Methods You Can Try Today
Swirling is one of the most satisfying parts of cold process soap making. You pour two or three colors into a mold, drag a tool through them, and somehow end up with something that looks like a piece of art. But getting there takes a little know-how.
This guide walks you through seven swirling methods, from dead-simple beginner techniques to designs that'll impress even experienced soap makers. Every technique here works with a standard loaf mold and basic cold process soap.
- Before You Swirl: The Setup That Matters
- 1. In-the-Pot Swirl (ITP)
- 2. Drop Swirl
- 3. Hanger Swirl
- 4. Spoon Plop
- 5. Column Pour
- 6. Pencil Line Technique
- 7. Spin Swirl
- Choosing the Right Recipe for Swirling
- Common Swirling Mistakes and How to Fix Them
- Colorants That Work Best for Swirls
- Frequently Asked Questions
Before You Swirl: The Setup That Matters
Successful swirls start before you ever pick up a colorant. Here's what you need to get right first.
Trace Is Everything
The single biggest factor in swirling success is your trace. You want a thin, light trace for most swirl techniques. Think of the consistency of thin cake batter or runny pudding. If your soap is thick like mashed potatoes, it won't flow or blend.
What thin trace looks like: when you lift your stick blender out of the batter, the drizzle that falls back sinks into the surface within a second or two. If it sits on top, you're already too thick.
Slow Down Your Recipe
Some recipes race to trace, leaving you no time to split, color, and pour. To buy yourself working time:
- Use a higher percentage of olive oil (40% or more)
- Keep your lye concentration around 30-33% (more water = slower trace)
- Soap at lower temperatures (85-95 degrees F for both lye solution and oils)
- Pulse your stick blender in short 2-3 second bursts instead of running it continuously
- Switch to hand stirring once you reach emulsion
Use our Soaply calculator to build a slow-moving recipe. Watch the bar properties to make sure you're still getting a hard, balanced bar.
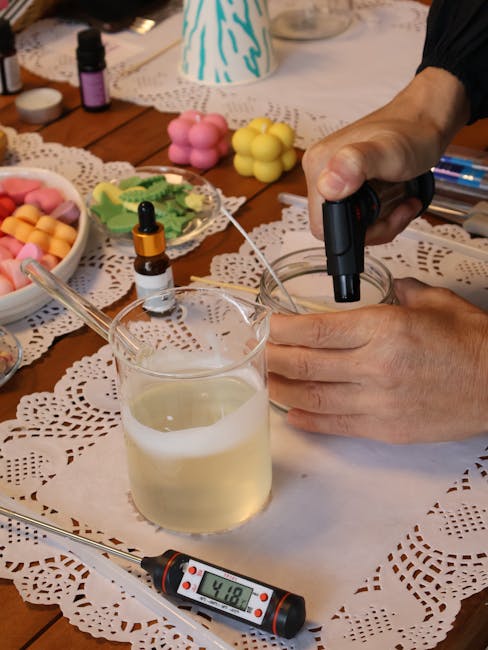
Prep Your Colors Ahead of Time
Nothing ruins a swirl faster than scrambling to mix colors while your soap thickens. Before you even start mixing lye, have your colorants ready:
- Pre-mix mica powders with a small amount of lightweight oil (1 tsp mica to 1 tbsp oil)
- Have squeeze bottles, cups, or pitchers ready for each color
- Lay out your tools (chopstick, hanger, skewer) within reach
1. In-the-Pot Swirl (ITP)
Difficulty: Easiest | Best for: Your very first swirl attempt
The in-the-pot swirl is the most forgiving technique because you do all the work in your mixing bowl before pouring.
How to Do It
- Bring your soap to a very thin trace
- Pour about 70% of the batter into your mold (this is your base color, which can be uncolored)
- Split the remaining 30% into one or two cups
- Add a different color to each cup and stir
- Pour the colored batter back into the main pot with the remaining base
- Use a chopstick or spatula to make 2-3 big figure-eight motions through the pot
- Pour the whole thing into your mold
Tips for Better ITP Swirls
- Don't over-stir. Two or three passes is plenty. More stirring = muddier results.
- Pour from different spots in the pot to distribute the swirl pattern across the mold.
- The colors will look bolder when you cut the bars than they appear on top.
What to Expect
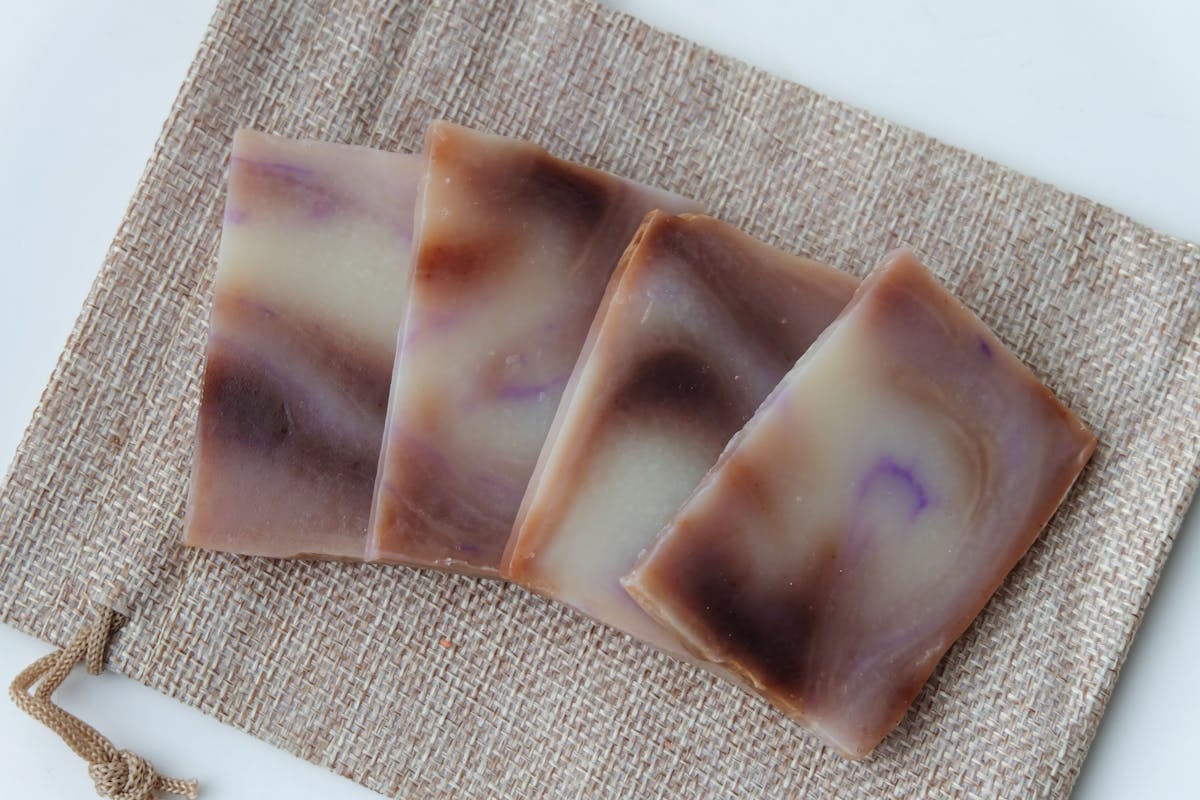
ITP swirls give you organic, unpredictable patterns. Every bar in the loaf will look different. That's part of the charm, and it means you don't need perfect technique to get beautiful results.
2. Drop Swirl
Difficulty: Easy | Best for: Bold, defined color separation
The drop swirl creates dramatic patterns by pouring colors directly into the mold from varying heights.
How to Do It
- Bring soap to thin trace
- Split batter into 2-3 cups and color each one
- Starting at one end of the mold, pour a stream of your first color
- Switch to your second color and pour right next to (or on top of) the first
- Move down the length of the mold, alternating colors
- The colors will push through each other, creating layers
The Height Trick
Pouring height changes the pattern dramatically:
- Pour from high up (12+ inches): The stream dives deep into the mold, creating tall, dramatic swirls that show on every bar
- Pour from low (2-3 inches): The color sits near the top, creating a more layered look
Alternate heights as you pour for the most interesting cross-sections.
Tips for Better Drop Swirls
- Keep your batter thin. Thick batter won't penetrate previous layers.
- Pour in thin streams, not big globs.
- You can run a chopstick through the top after pouring for extra dimension, but it's not required.
3. Hanger Swirl
Difficulty: Medium | Best for: Elegant, flowing patterns
The hanger swirl uses a wire hanger (or any long, thin tool) dragged through layered soap to create flowing, ribbon-like patterns.
How to Do It
- Bring soap to thin trace and split into 2-3 colors
- Pour colors into the mold in layers or alternating sections
- Take a wire hanger bent into a flat zigzag shape (or a long chopstick)
- Insert the tool to the bottom of the mold at one end
- Slowly drag it in a side-to-side zigzag pattern down the length of the mold
- Pull the tool out at the other end
Making Your Hanger Tool
Bend a wire coat hanger into this shape:
- Straighten the hanger
- Bend it into a series of S-curves or zigzags that fit inside your mold width
- The bends should be about 1-1.5 inches apart
You can also buy dedicated soap swirl tools, but a hanger works perfectly.
Tips for Better Hanger Swirls
- Move slowly. Fast movements create muddy, blended colors instead of clean swirls.
- Keep the tool at the bottom of the mold for the first pass, then lift it slightly for a second pass at the top. This creates swirls at different depths.
- One pass is usually enough. Two passes can add complexity, but three will start blending everything together.
4. Spoon Plop
Difficulty: Easy | Best for: Thick, layered patterns
The spoon plop is exactly what it sounds like. You plop spoonfuls of colored soap batter into the mold, one on top of another.
How to Do It
- Bring soap to a medium-thin trace (slightly thicker than for other swirls)
- Split batter into 2-4 colors
- Using a large spoon, drop a glob of one color into the center of the mold
- Drop a glob of the next color on top of the first
- Continue alternating colors, always dropping in the same spot
- Each new plop pushes the previous ones outward
Tips for Better Spoon Plops
- This technique actually works better at a slightly thicker trace than others, since you want the colors to hold their shape rather than blend.
- Alternate between big and small plops for variety.
- Try dropping from different positions along the mold for a less centered pattern.
- The cut bars will show beautiful bullseye-style rings.
5. Column Pour
Difficulty: Medium | Best for: Dramatic, tall swirl patterns
The column pour creates bold vertical patterns by pouring colors through a tube or divider placed in the center of the mold.
How to Do It
- Place a PVC pipe or cardboard tube vertically in the center of your mold
- Bring soap to thin trace and split into colors
- Pour your base color around the outside of the tube, filling the mold about 75%
- Pour your accent colors into the tube, alternating colors
- Slowly lift the tube straight up
- The colors inside the tube flow outward through the base
Tips for Better Column Pours
- A 2-inch diameter PVC pipe works well for standard loaf molds
- Keep the tube steady as you lift it; wobbling creates uneven patterns
- Pour slowly into the tube so colors layer rather than mix
- You can do a gentle hanger swirl after removing the tube for extra movement
6. Pencil Line Technique
Difficulty: Easy | Best for: Clean, graphic two-tone bars
The pencil line creates a crisp, defined line between two colors. It's not technically a swirl, but it's a design technique every soap maker should know.
How to Do It
- Bring soap to thin trace and split into two colors
- Pour your first color into the mold, filling it about halfway
- Sprinkle a thin, even line of a contrasting powder across the surface (activated charcoal, cocoa powder, or dry mica work well)
- Very gently pour the second color on top, using a spatula or spoon to break the fall so it doesn't punch through the powder line
- The powder creates a visible dividing line between the two layers
Tips for Better Pencil Lines
- Pour the second layer over the back of a spoon held close to the surface. This prevents the stream from breaking through your line.
- Use fine powder, not coarse. Activated charcoal and oxide powders work best.
- Keep both batters at the same thin trace so they don't blend at different rates.
7. Spin Swirl
Difficulty: Hard | Best for: Stunning, flower-like patterns when cut
The spin swirl is one of the most dramatic techniques. It creates gorgeous petal or flower patterns visible in every single bar.
How to Do It
- Place your filled mold on a lazy susan or turntable
- Bring soap to thin trace and split into 2-3 colors
- Pour colors into the mold in alternating lines or drops
- Spin the lazy susan in one direction, then abruptly stop
- The momentum creates spiral patterns through the soap
Tips for Better Spin Swirls
- A lazy susan is basically required. Trying to spin a silicone mold by hand doesn't give you enough control.
- One or two spins is plenty. Over-spinning blends everything into a muddy mess.
- Pour your colors in a grid pattern (alternating colors in rows) before spinning for the most defined results.
- Thin trace is critical. Thick batter won't move with the spin.
- This technique takes practice. Your first attempt probably won't be Instagram-worthy, and that's fine.
Choosing the Right Recipe for Swirling
Not every soap recipe is good for swirls. Here's a recipe designed specifically for maximum working time:
| Oil | Percentage |
| ----- | ----------- |
| Olive Oil | 40% |
| Coconut Oil | 25% |
| Shea Butter | 15% |
| Sweet Almond Oil | 10% |
| Castor Oil | 5% |
| Rice Bran Oil | 5% |
Superfat: 5% | Lye Concentration: 30%
The high olive oil and lower lye concentration give you plenty of working time. Use our Soaply calculator to get exact lye and water amounts for your batch size.
Fragrances That Play Nice with Swirls
Avoid fragrances that accelerate trace. Stick with:
- Most citrus essential oils (they're slow)
- Lavender essential oil
- Fragrance oils labeled "no acceleration" or "behaves well in CP"
Stay away from:
- Floral fragrance oils (many accelerate)
- Spice blends (cinnamon, clove)
- Anything with a high vanilla content (can cause ricing and acceleration)
If you're not sure about a fragrance, add it at very thin trace and stir by hand instead of stick blending. Check out our fragrance guide for more details on usage rates.
Common Swirling Mistakes and How to Fix Them
Muddy Colors
Problem: Your swirl looks like a brown or gray mess instead of distinct colors.
Cause: Too much swirling. Every pass of your tool blends the colors more.
Fix: Use fewer swirl passes. One or two deliberate motions create cleaner results than five or six.
Colors Are Too Similar
Problem: You can barely see the swirl in the finished bar.
Cause: Not enough contrast between colors.
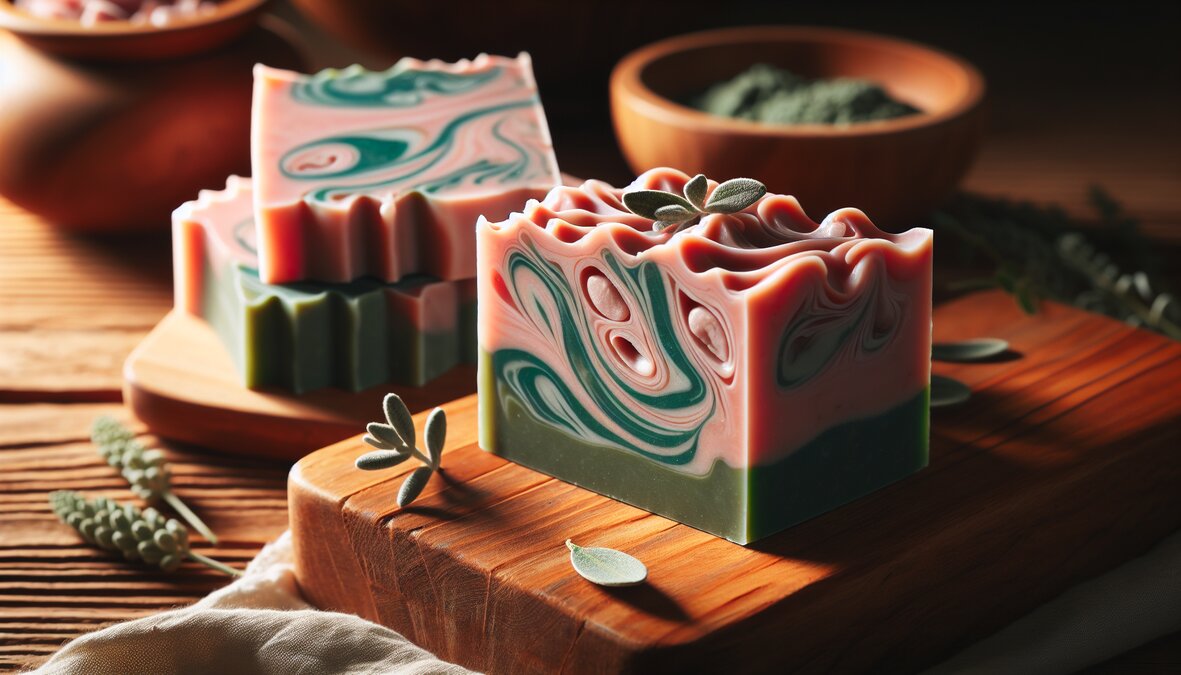
Fix: Use colors that are far apart on the spectrum. White and dark blue. Black and bright orange. Uncolored soap with a bold mica. The more contrast, the more dramatic the swirl.
Soap Got Too Thick to Swirl
Problem: Your batter set up before you could finish the design.
Cause: Over-blending, hot temperatures, or a fast-moving recipe.
Fix: Next time, soap cooler, use more olive oil, use a lower lye concentration, and only pulse the stick blender briefly. Switch to hand stirring once you see the batter start to emulsify.
Uneven Color Distribution
Problem: One color dominates while others barely show up.
Cause: Unequal splitting of batter between colors.
Fix: Measure your batter splits by weight, not by eye. If you want three equal colors, weigh the total batter and divide it into thirds.
Colorants That Work Best for Swirls
Micas
Micas are the go-to for swirling. They're vibrant, stable, and available in hundreds of colors. Pre-disperse in lightweight oil before adding to soap.
- Mica Powder Set for Soap - Starter sets give you plenty of options
Oxides and Pigments
More muted than micas but very stable. Great for natural-looking swirls.
- Titanium dioxide (white)
- Iron oxides (brown, red, yellow, black)
- Chromium oxide (green)
- Ultramarine (blue, purple, pink)
Natural Colorants
Natural colorants can work for swirls but they're less predictable. The most reliable ones for swirling:
- Activated charcoal (black)
- Cocoa powder (brown)
- French green clay (sage green)
- Rose clay (pink)
Check out our natural colorants guide for usage rates and stability info.
Start Simple, Build Up
Here's my recommended progression for learning swirls:
- First swirl: In-the-pot with two colors
- Second try: Drop swirl with two colors
- Third try: Hanger swirl with three colors
- Fourth try: Pencil line (two-tone)
- Advanced: Spin swirl or column pour
Don't jump straight to the complex techniques. Each simpler method teaches you something about how soap batter moves and how colors interact. That knowledge makes the harder techniques much more achievable.
Ready to plan your first swirl recipe? Use the Soaply calculator to build a slow-moving recipe and check your bar properties before you start. Happy swirling!
💬 Frequently Asked Questions
What is the easiest soap swirl technique for beginners?
The in-the-pot (ITP) swirl is the easiest starting point. You mix colors directly in the pot with a few figure-eight motions, then pour into the mold. It's forgiving because the swirl happens before pouring, so there's no pressure to work fast.
How do I keep my soap thin enough for swirling?
Use a recipe with at least 40% olive oil, set your lye concentration to 30-33%, soap at 85-95 degrees F, and only pulse your stick blender in short bursts. Switch to hand stirring as soon as the batter reaches emulsion. These steps together give you several minutes of working time.
Why do my soap swirls always turn muddy?
Muddy swirls come from over-swirling. Every pass of your tool blends the colors more. Limit yourself to one or two deliberate passes with a hanger or chopstick. Also use colors with strong contrast (like white and dark blue) instead of similar shades.
Do I need special tools for soap swirling?
Not really. A chopstick, a bent wire hanger, and a few plastic cups are all you need for most techniques. A lazy susan helps for spin swirls, and squeeze bottles make pouring easier, but they're optional. Start with what you have.
Can I swirl hot process soap?
Hot process soap is very thick after cooking, which limits swirling options. You can do rough ITP swirls or spoon plops, but you won't get the clean, flowing patterns possible with cold process. If swirling is your goal, stick with cold process.
Ready to Try It?
Use our free soap calculator to create your perfect recipe with real-time property predictions.
Open Calculator